Images can often contain important text, whether it’s a scanned document, a screenshot, or a photo with embedded information. However, translating this text can be challenging if it’s not in an editable format. This guide will walk you through the process of making image text accessible and ready for translation, using different tools and techniques in Microsoft Word.
We typically use two main methods for this:
Creating a Bilingual Table: Extract the text from the image and organize it into a bilingual table below the image for easy reference.
Text boxes: Insert editable text boxes directly over the image. You can choose to clean the image first, depending on its complexity.
Bilingual Table
When working with image-based text, one effective method for organizing and translating the content is by creating a bilingual table below the image. This approach not only helps in maintaining a clear structure but also ensures that the original and translated texts are easily comparable.
Creating a bilingual table
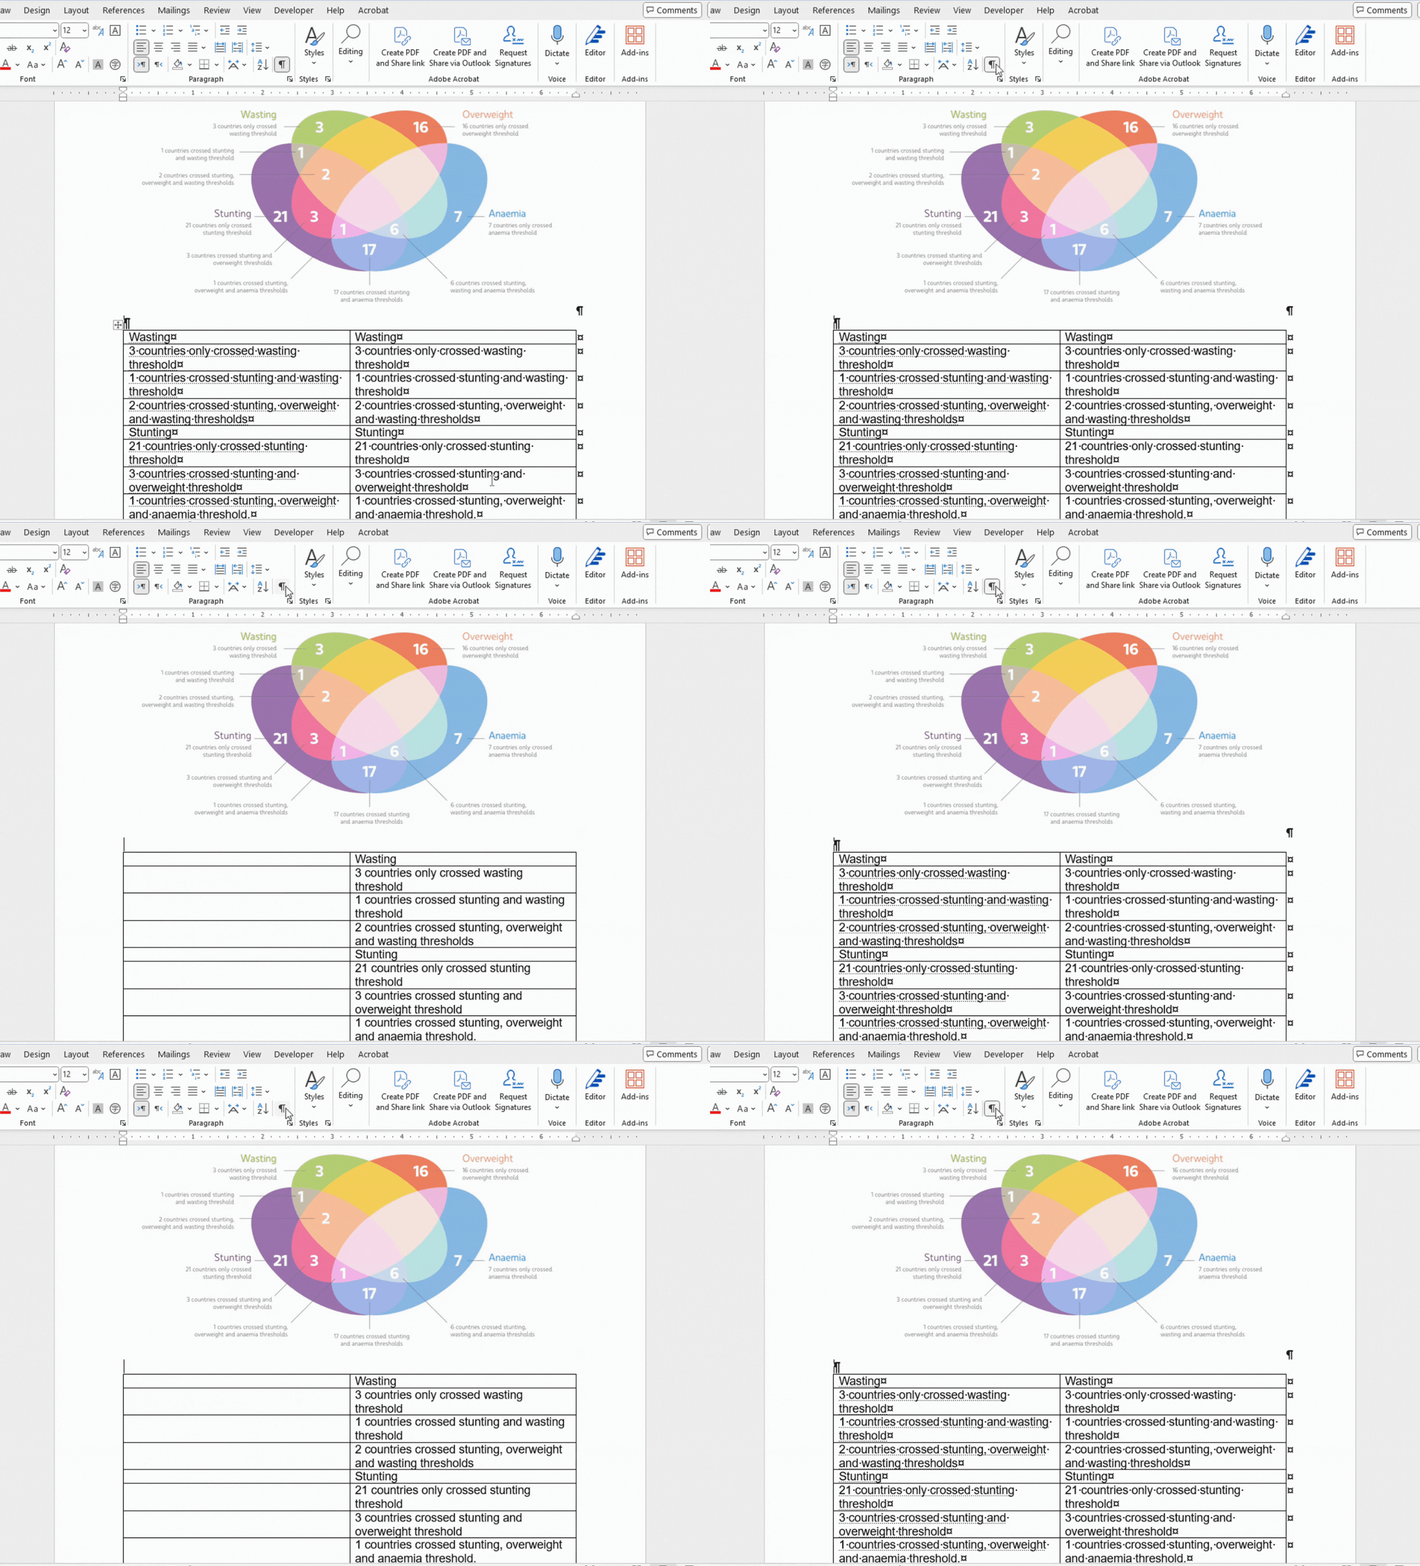
Extract all the text of the image into the left column of the table. Review it and make sure the text is correctly extracted.

Duplicating source text
Then, copy the entire column and paste it into the right column (this will end up as the target language).

Hide source text
Finally, hide the entire left column by selecting it and press ctrl+shift+h (or on mac cmd+d and select "Hidden" in the font dialog box that appears.) Now by enabling or disabling the paragraph mark you can either show or hide the text. The right column text will be translated, and the left will be kept as source.
Text boxes
This approach is ideal if you want to preserve the original document's layout and images.
If the image contains a large amount of text, you can use an OCR tool to extract it. For smaller amounts of text, manual typing might be preferable. In either case, always double-check that the text has been accurately extracted or typed.
In this example, the image has a plain white background, making it easy to place text boxes with a matching white background over the text.
Insert text boxes
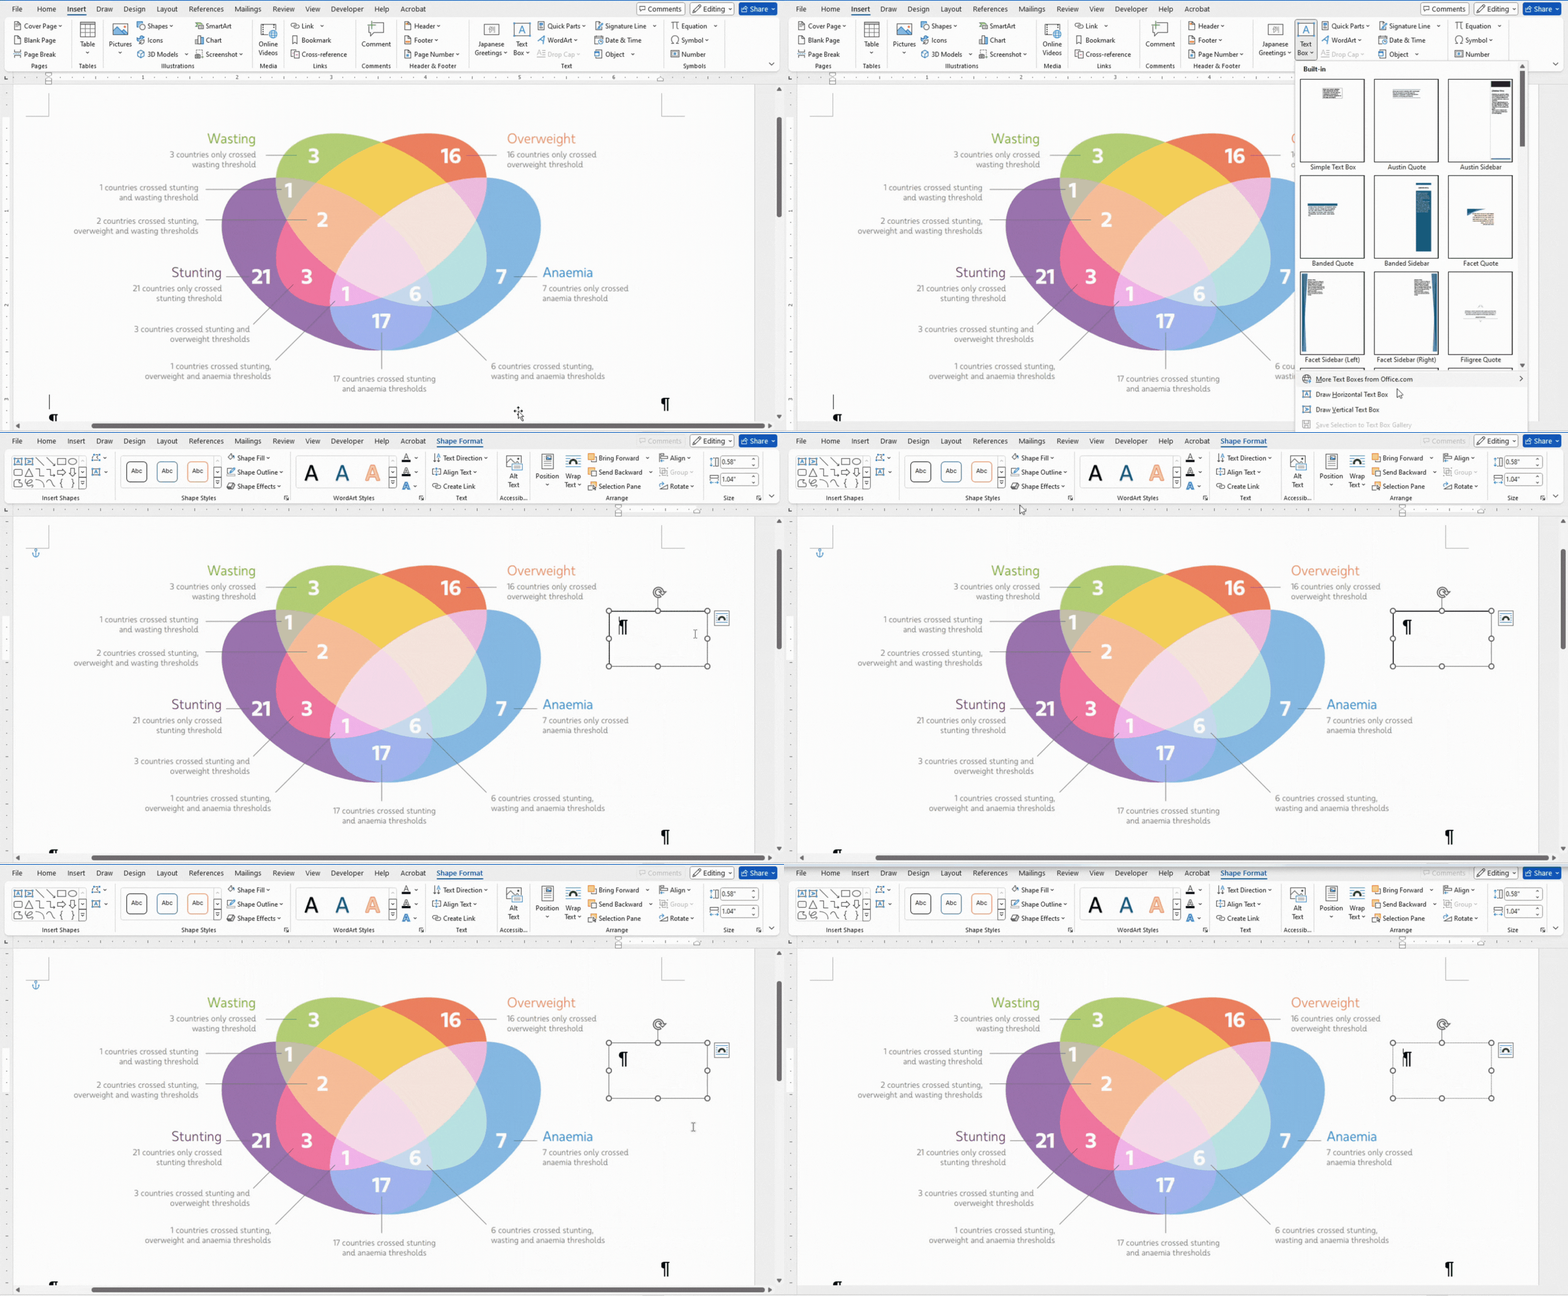
To insert a text box, go to the "Insert" tab, and select "Text box" and "Draw horizontal textbox". In "Shape Fill", select the desired background color of the text box, and in "Shape Outline", choose "No Outline".
Formatting text
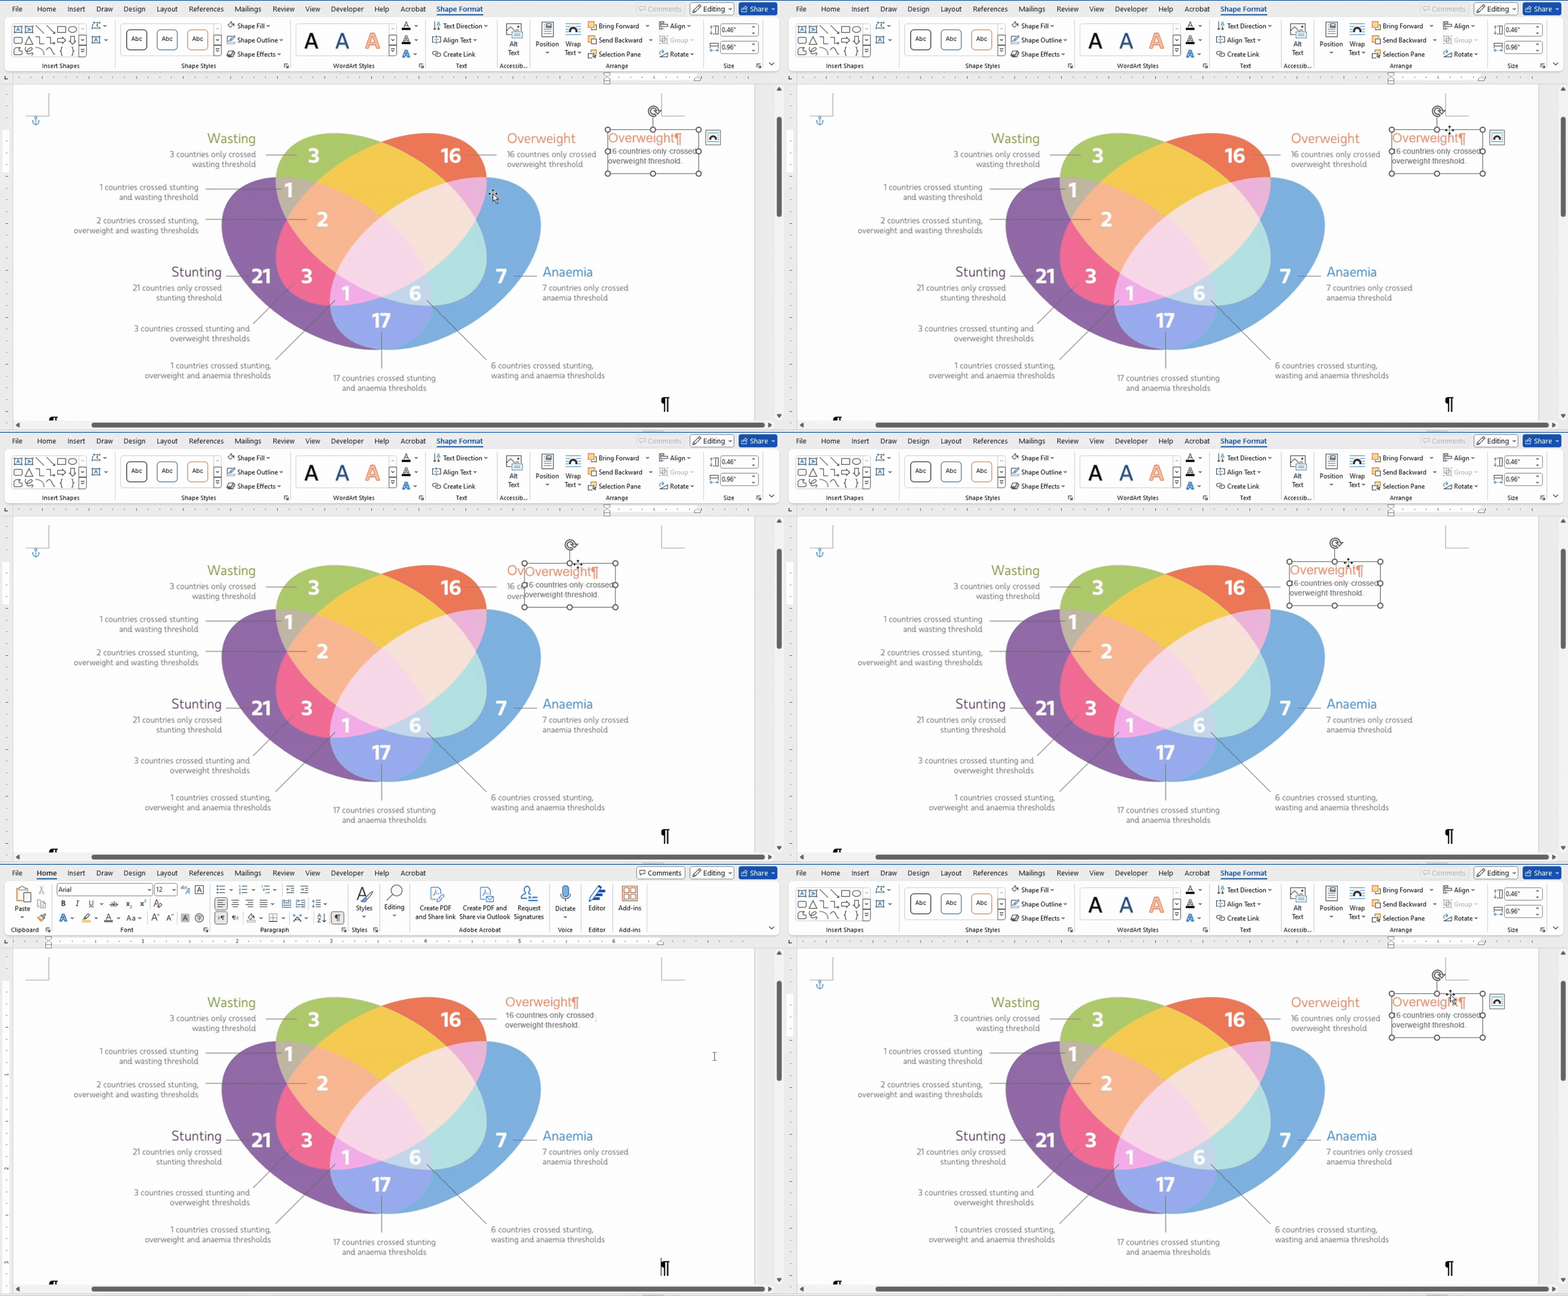
Play around with the text color and size to match it as closely as possible to the text in the before positioning the text box in its place.
Advanced option
If you have more advanced graphic design skills, you can use a graphic design software to remove the text completely from images before inserting text boxes. This is particularly useful if the mage has a more complex background that a plain background text box won't cover properly (like a gradient background, for example). Adobe Photoshop, for example, offers powerful tools to easily remove text from any background with seamless results.
Conclusions
Each of these methods offers distinct advantages, making them suitable for different types of translation projects. The choice of method should be guided by the specific requirements and goals of the project. For instance, if the goal is to avoid altering the images while providing a clear, side-by-side comparison of the original and translated text, bilingual tables might be the best option. On the other hand, if it's crucial to preserve the original document's layout and images, integrating the editable text directly within the image with text boxes might be the preferred method.

