When converting a PDF with more complex layout into a Microsoft Word document, the layout often requires manual adjustments afterwards, as the tool you use for conversion may not always replicate it as desired.
In this article, we will be formatting and re-creating the layout of the same Word document that we exported when converting a PDF with ABBYY FineReader in a previous blog post. When we convert PDFs to Word (with layout) for translation, we typically choose to export as plain text and then manually replicate the layout afterwards. This will provide us better control over the different elements in the document compared to an automatic conversion.
While Microsoft Word is not a design Software, its layout capabilities might surprise you! Although, the layout quality will never match that of specialized design software like Adobe InDesign.
Let's begin!
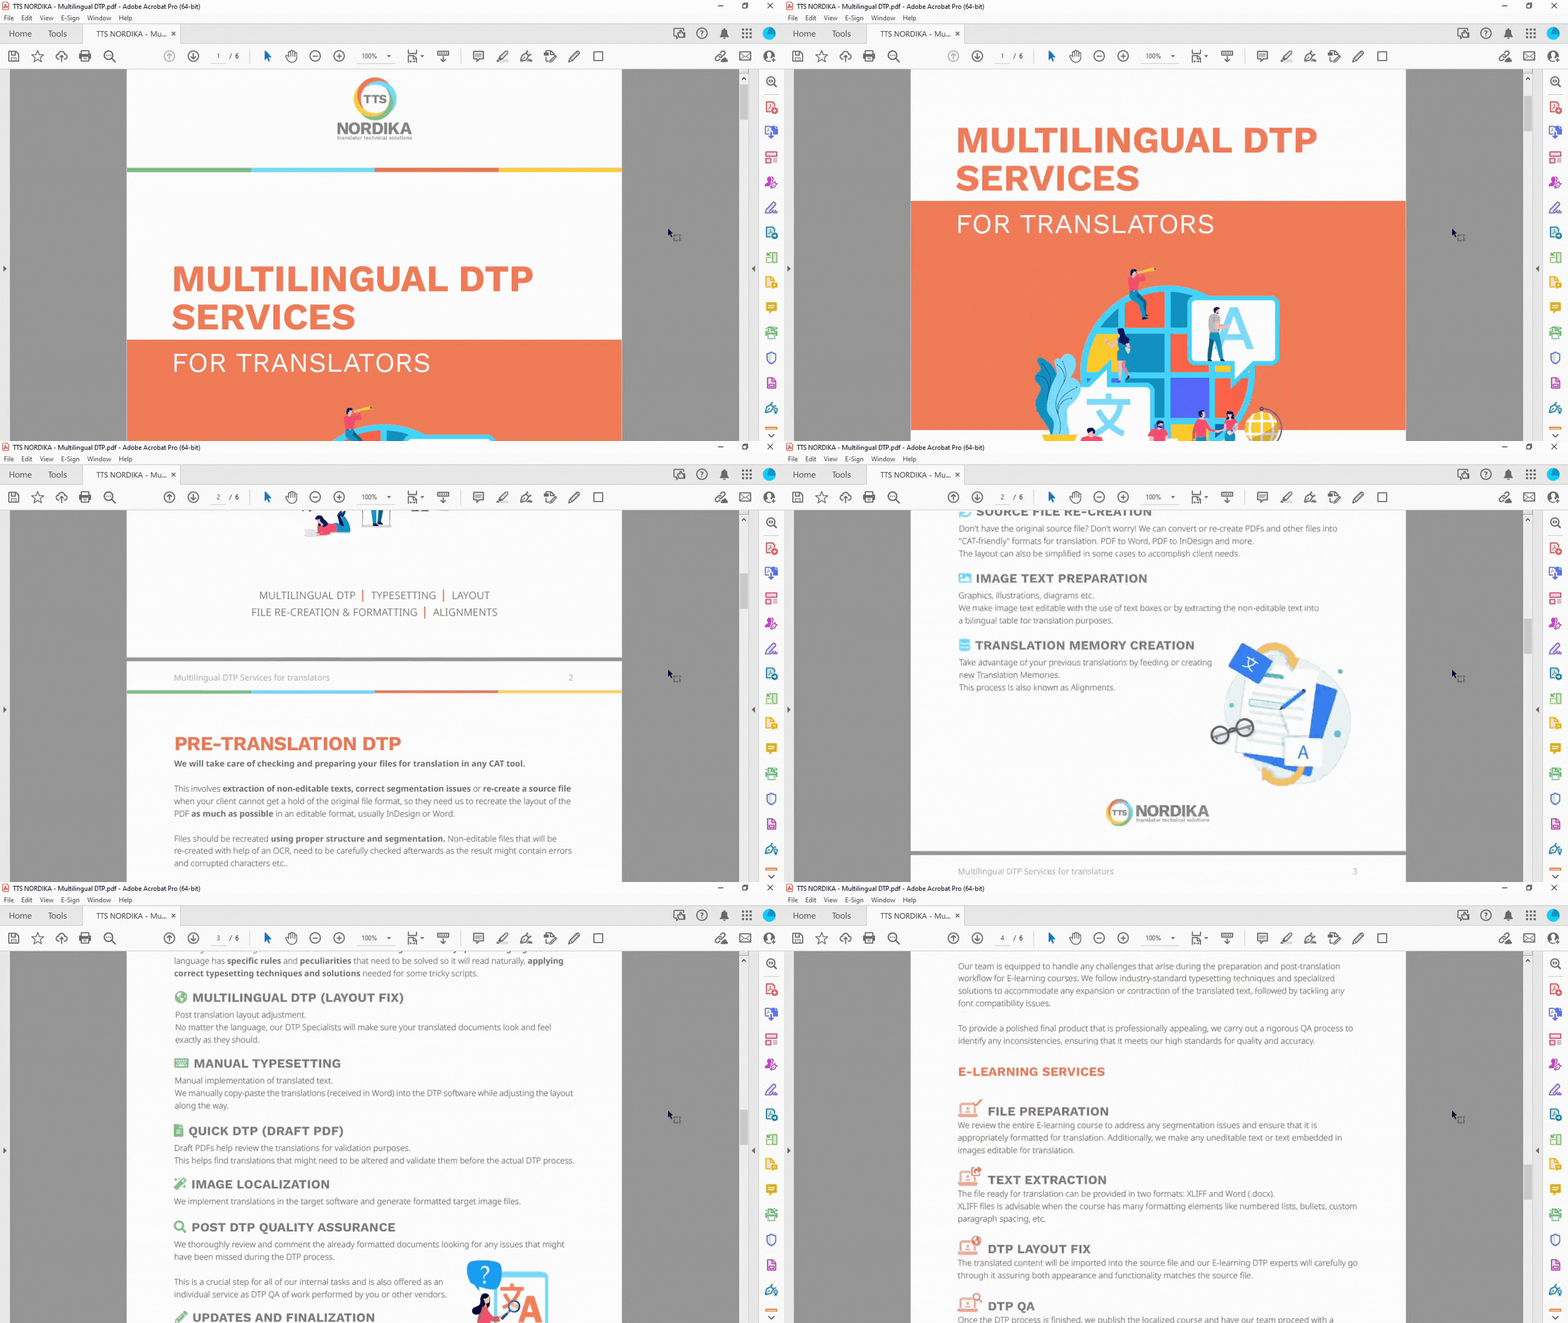
Here is the source document:
Here is the document we'll be working with:
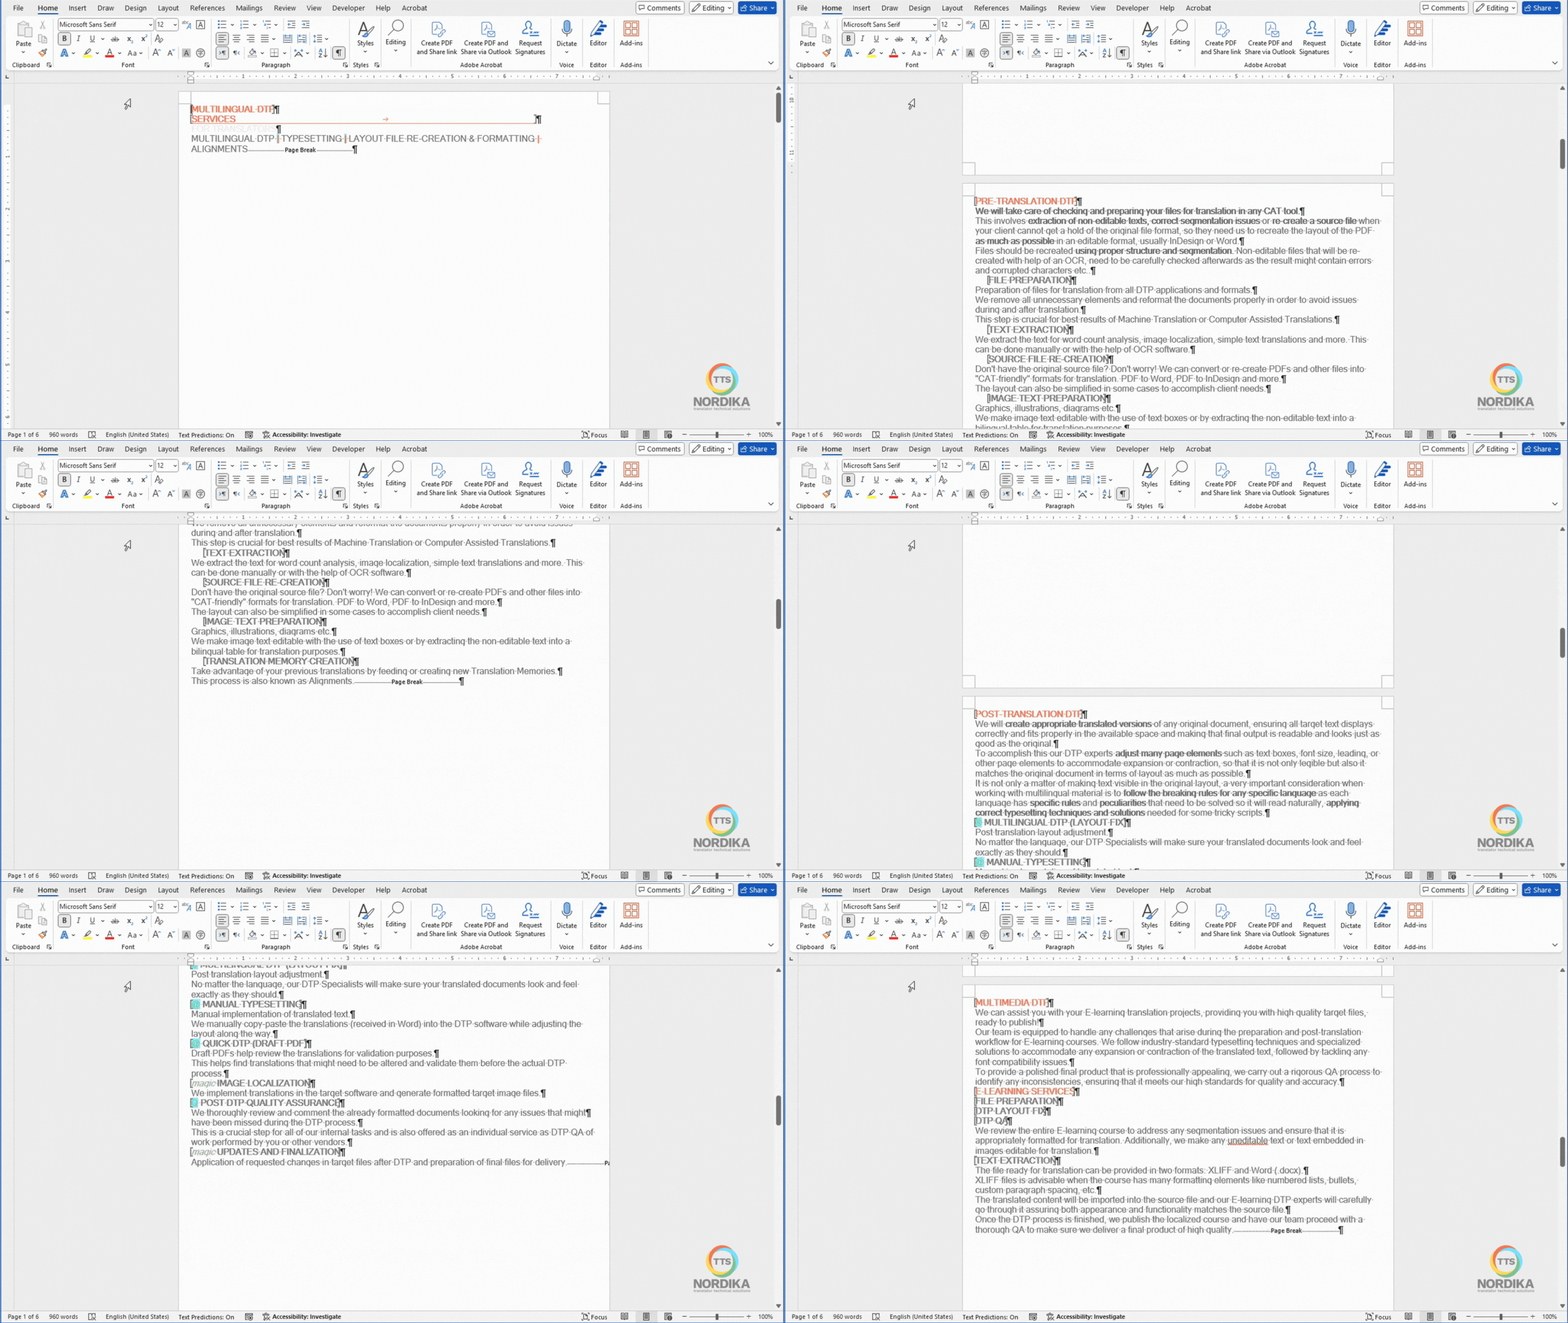
Remove unwanted font styles
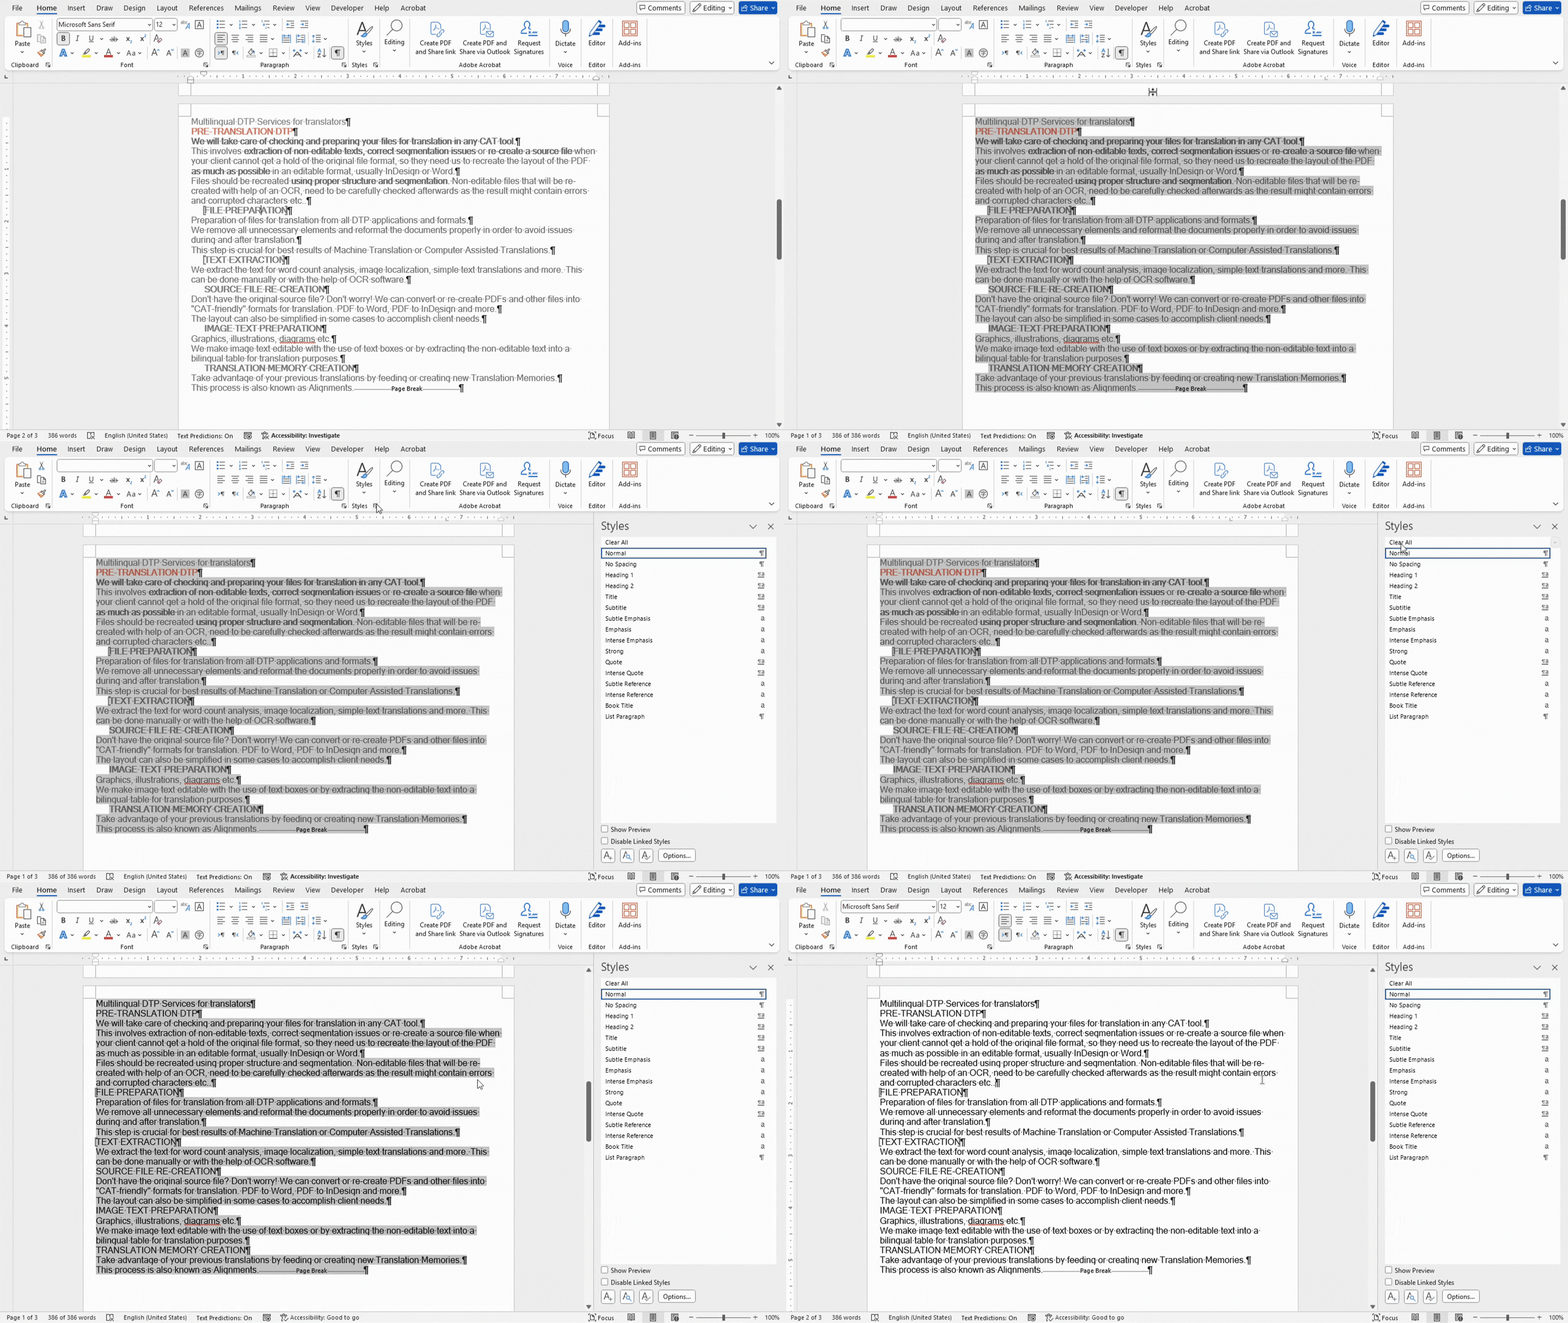
The first thing we do is removing all styles from the document. By default, the converted document sometimes includes some unwanted styles and fonts, we will later be adding the correct styles manually instead. Select all the text and ("ctrl + a"), then open the styles panel and click "Clear all".
Remove unnecessary bookmarks
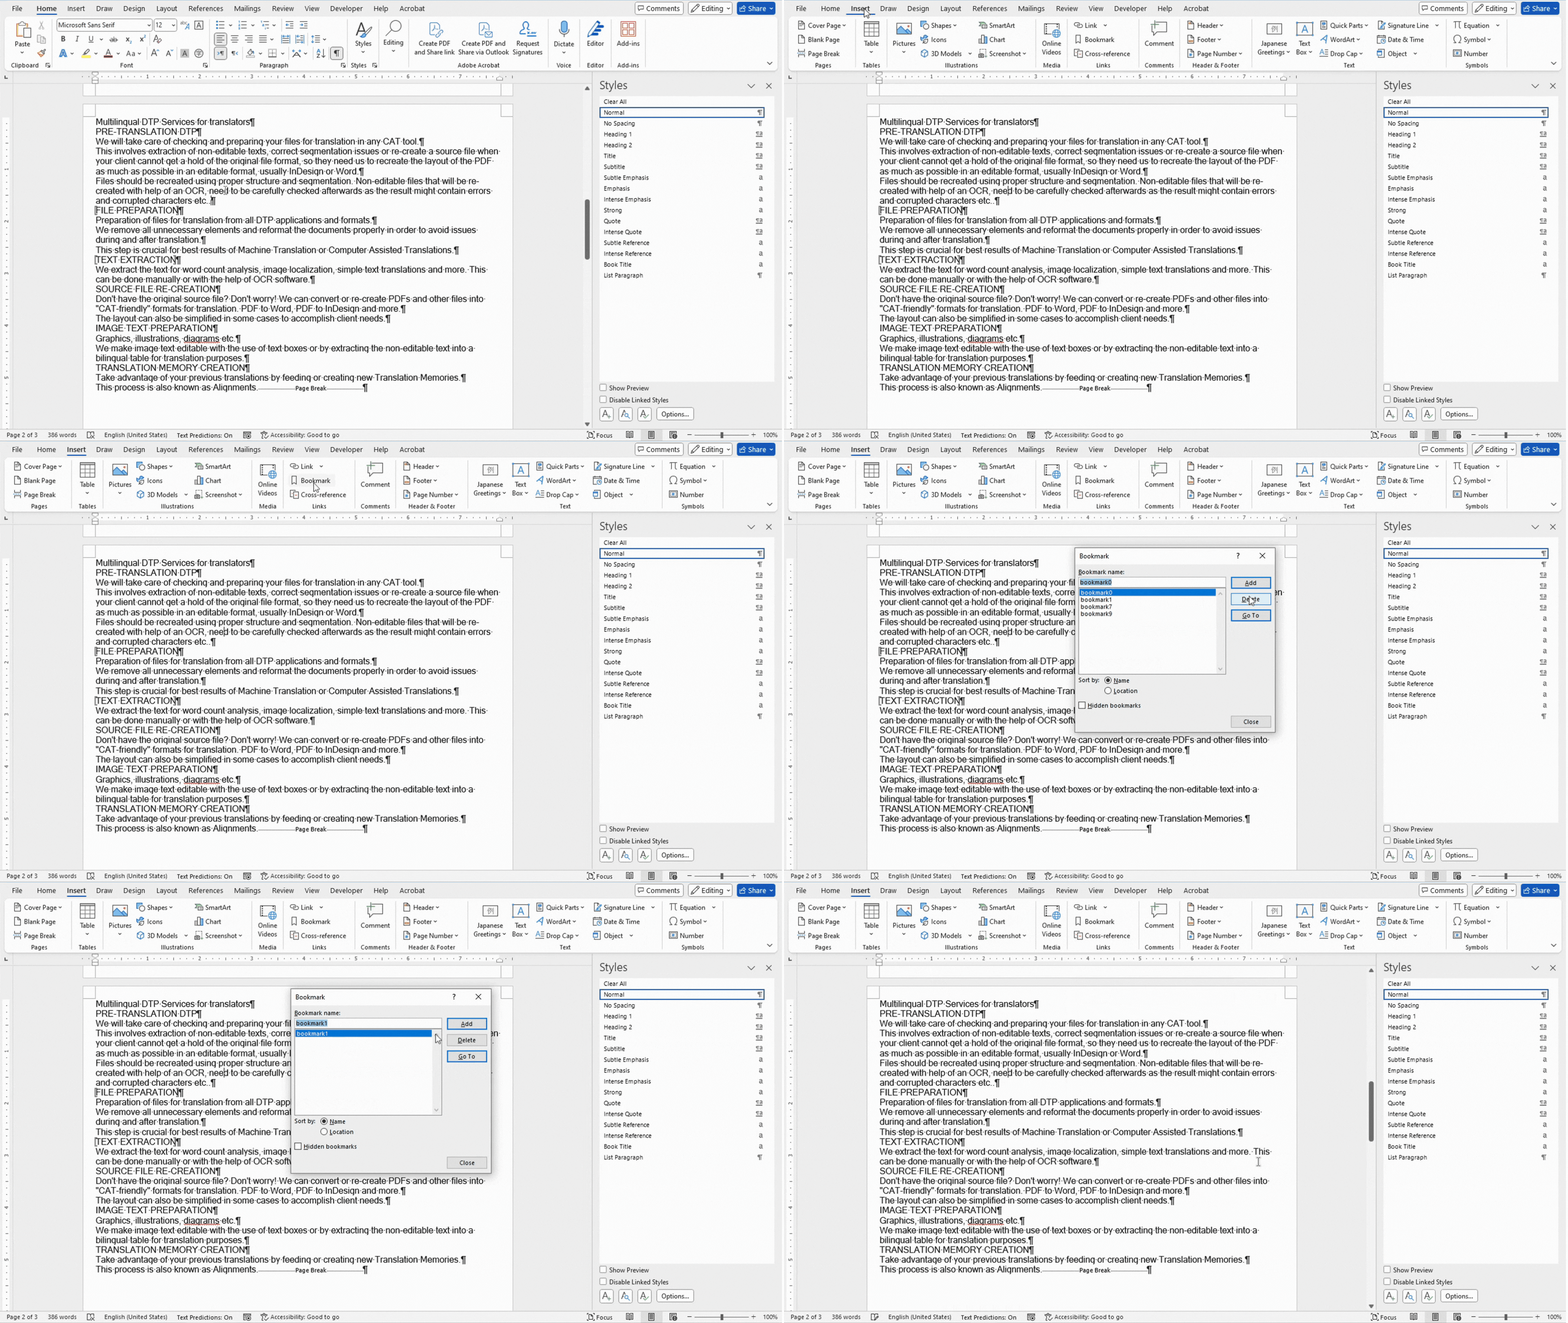
The document may also contain numerous bookmarks that are not necessary to keep. These can be deleted by clicking the "Insert" tab and then select "Bookmarks".
Re-create layout
Insert images
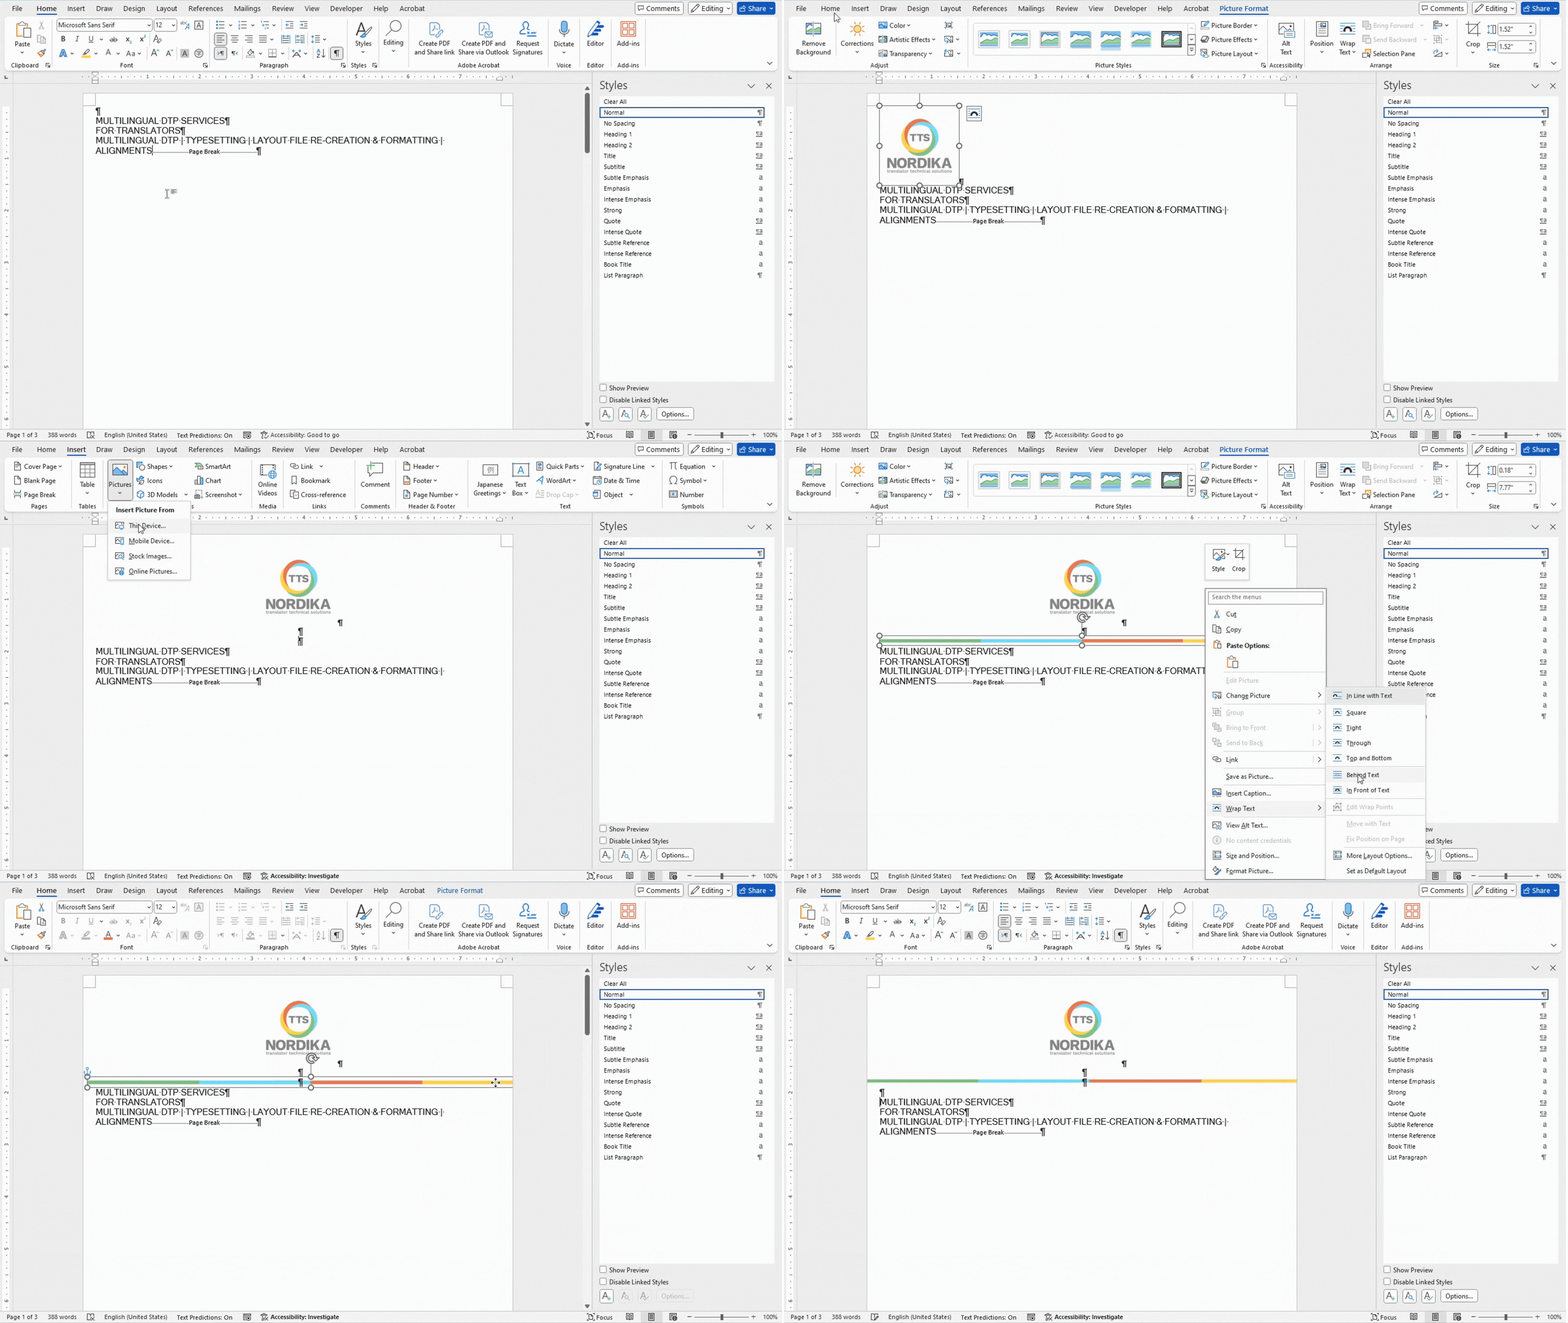
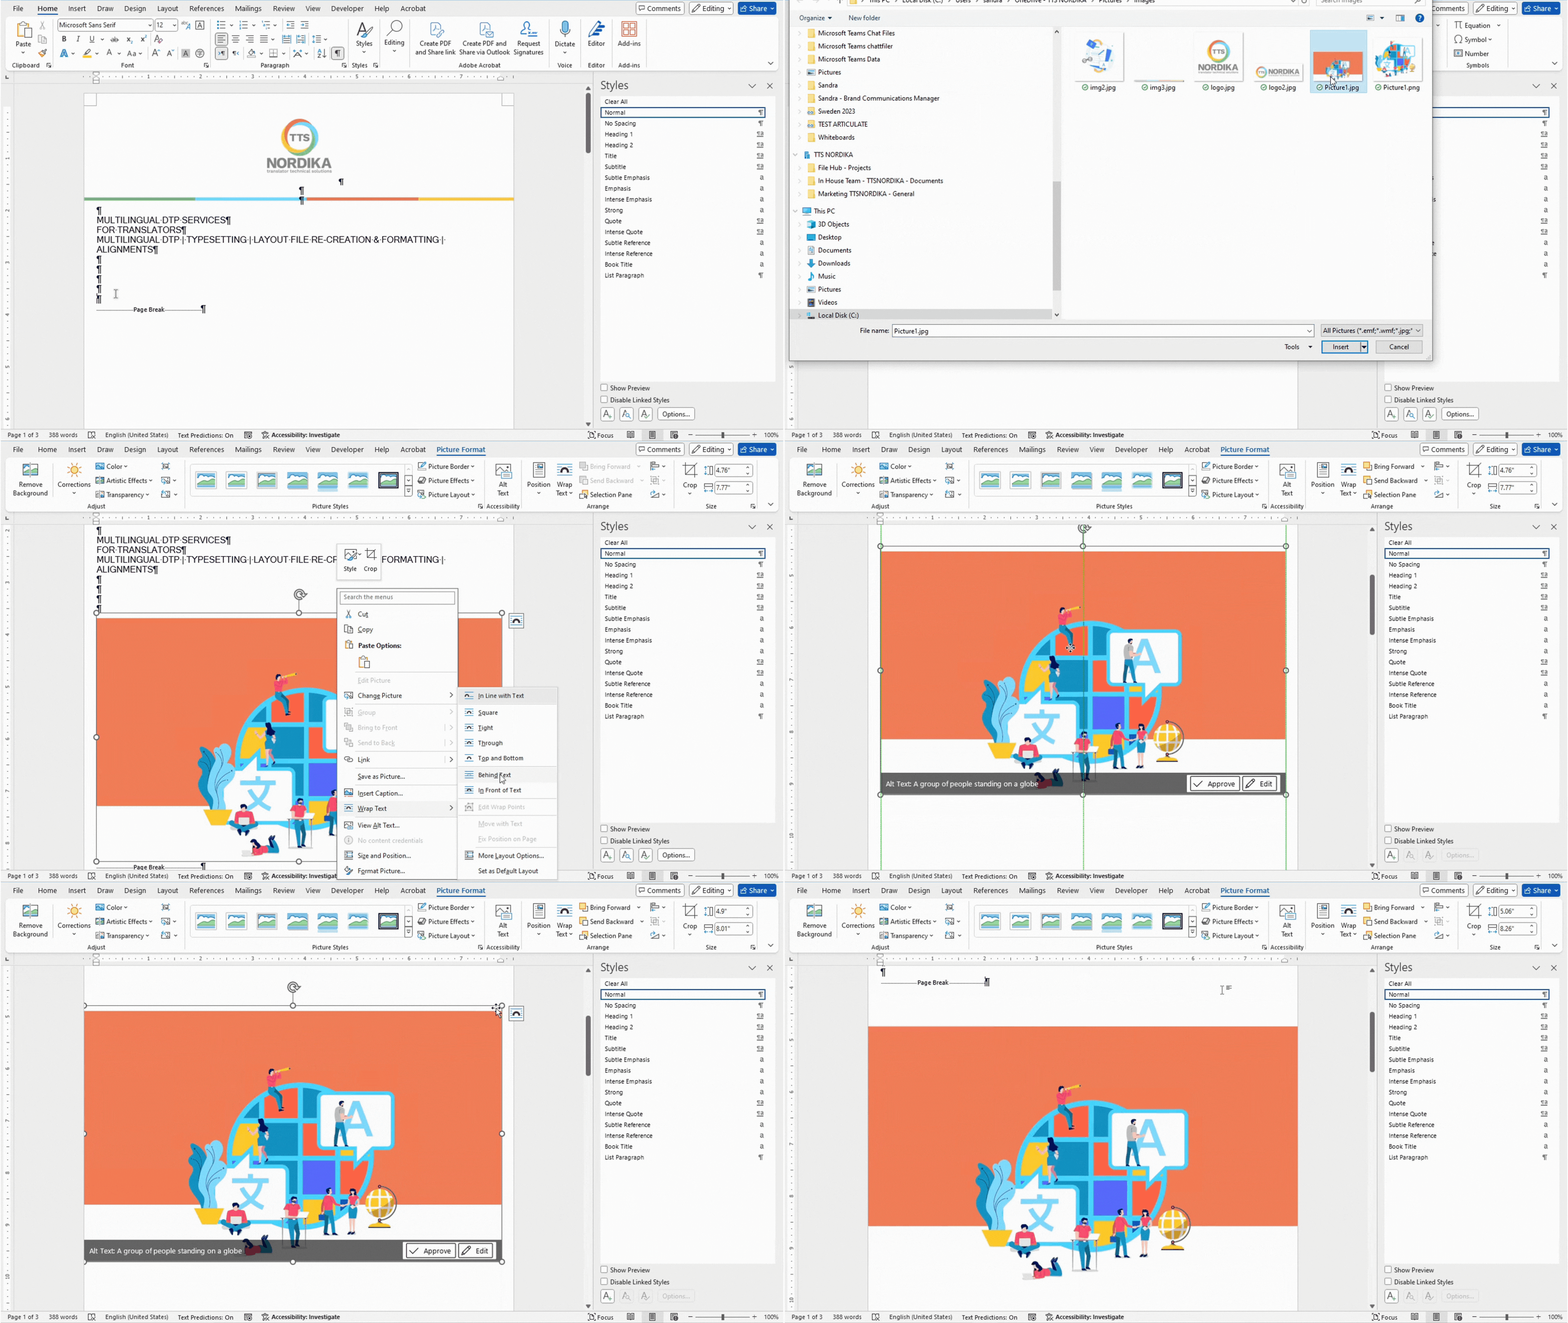
We begin by inserting the logo and images of the cover page (we have already saved all the images of the source document). Insert images by going to "Insert", "Picture" and choose "This device".
It might be necessary to modify the size of the images. Also, to be able to move images around freely, click on the image and select "Wrap text" and choose "Behind text", for example.
Apply text styles
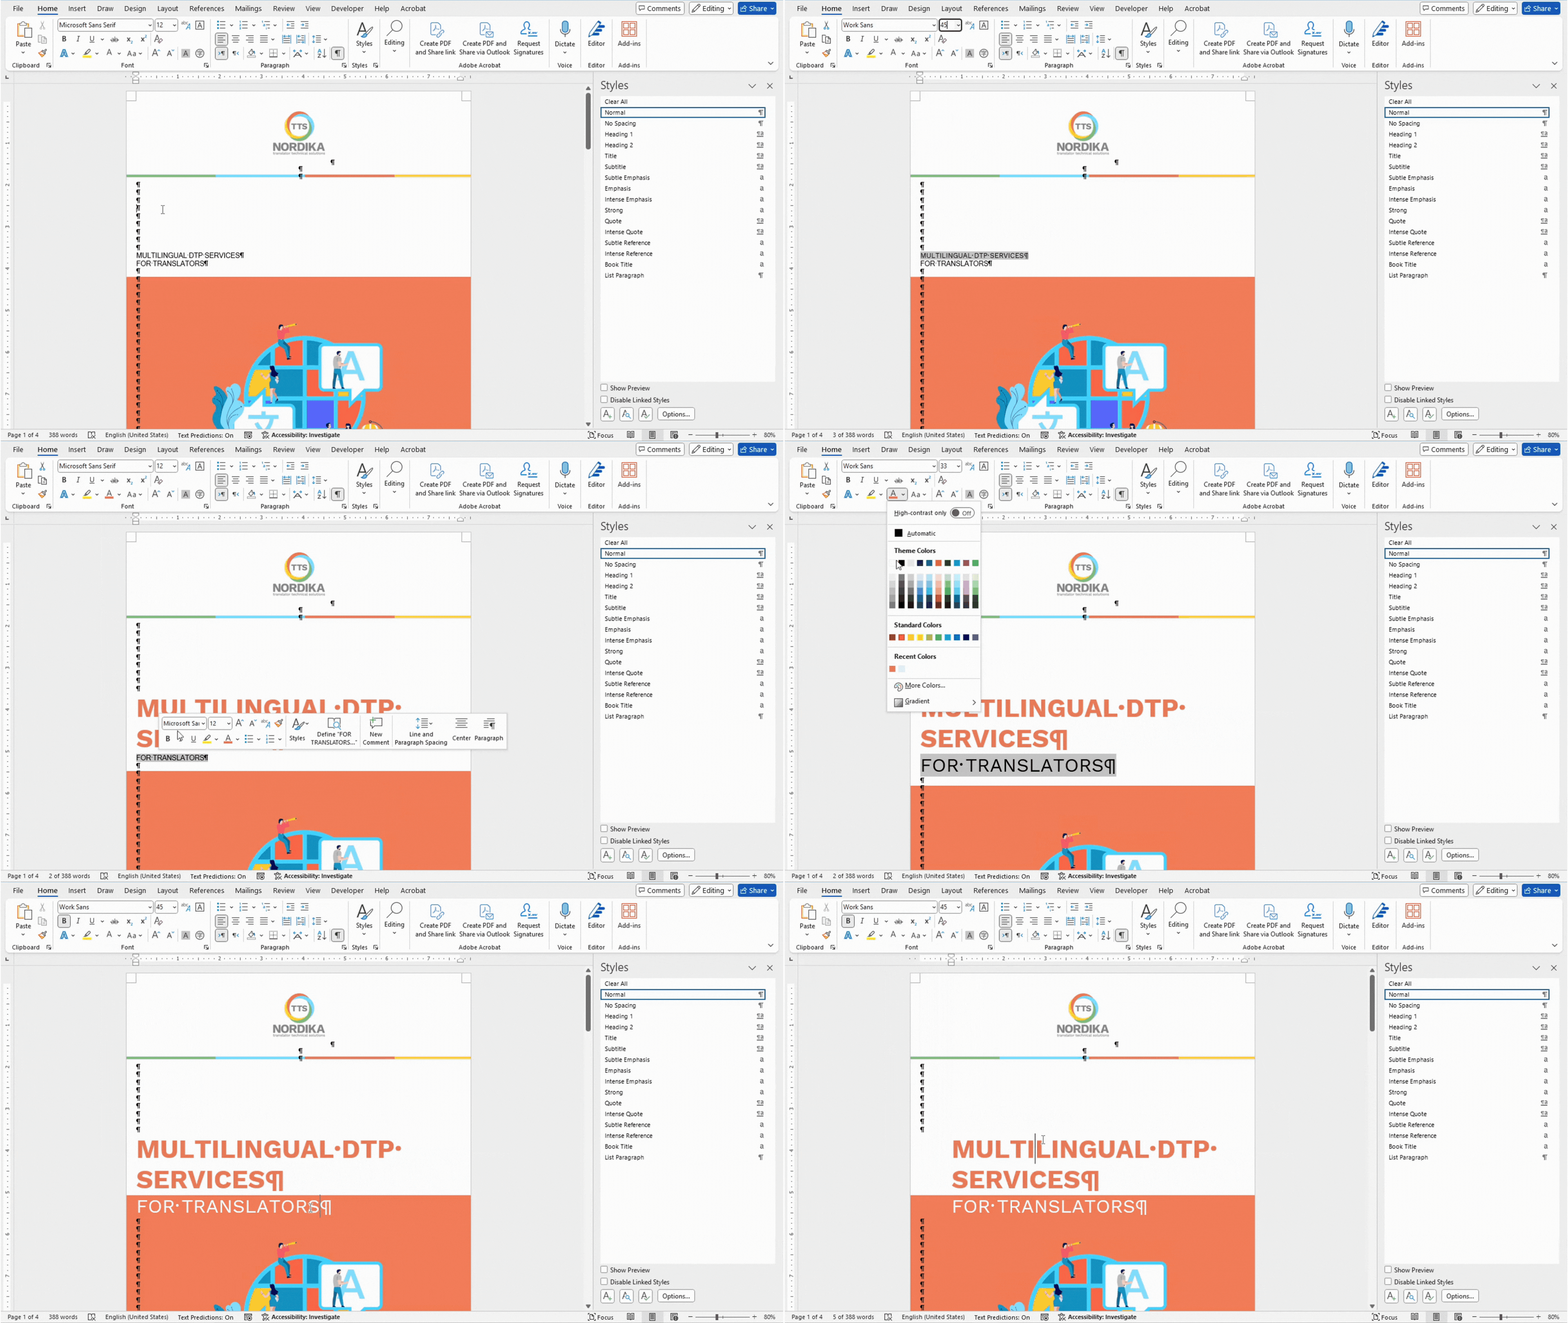
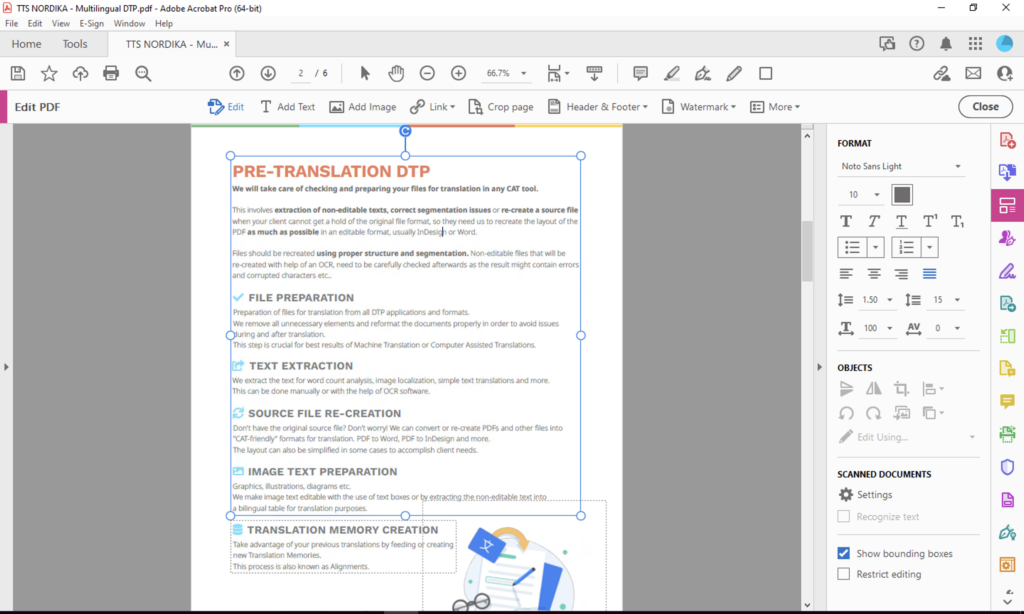
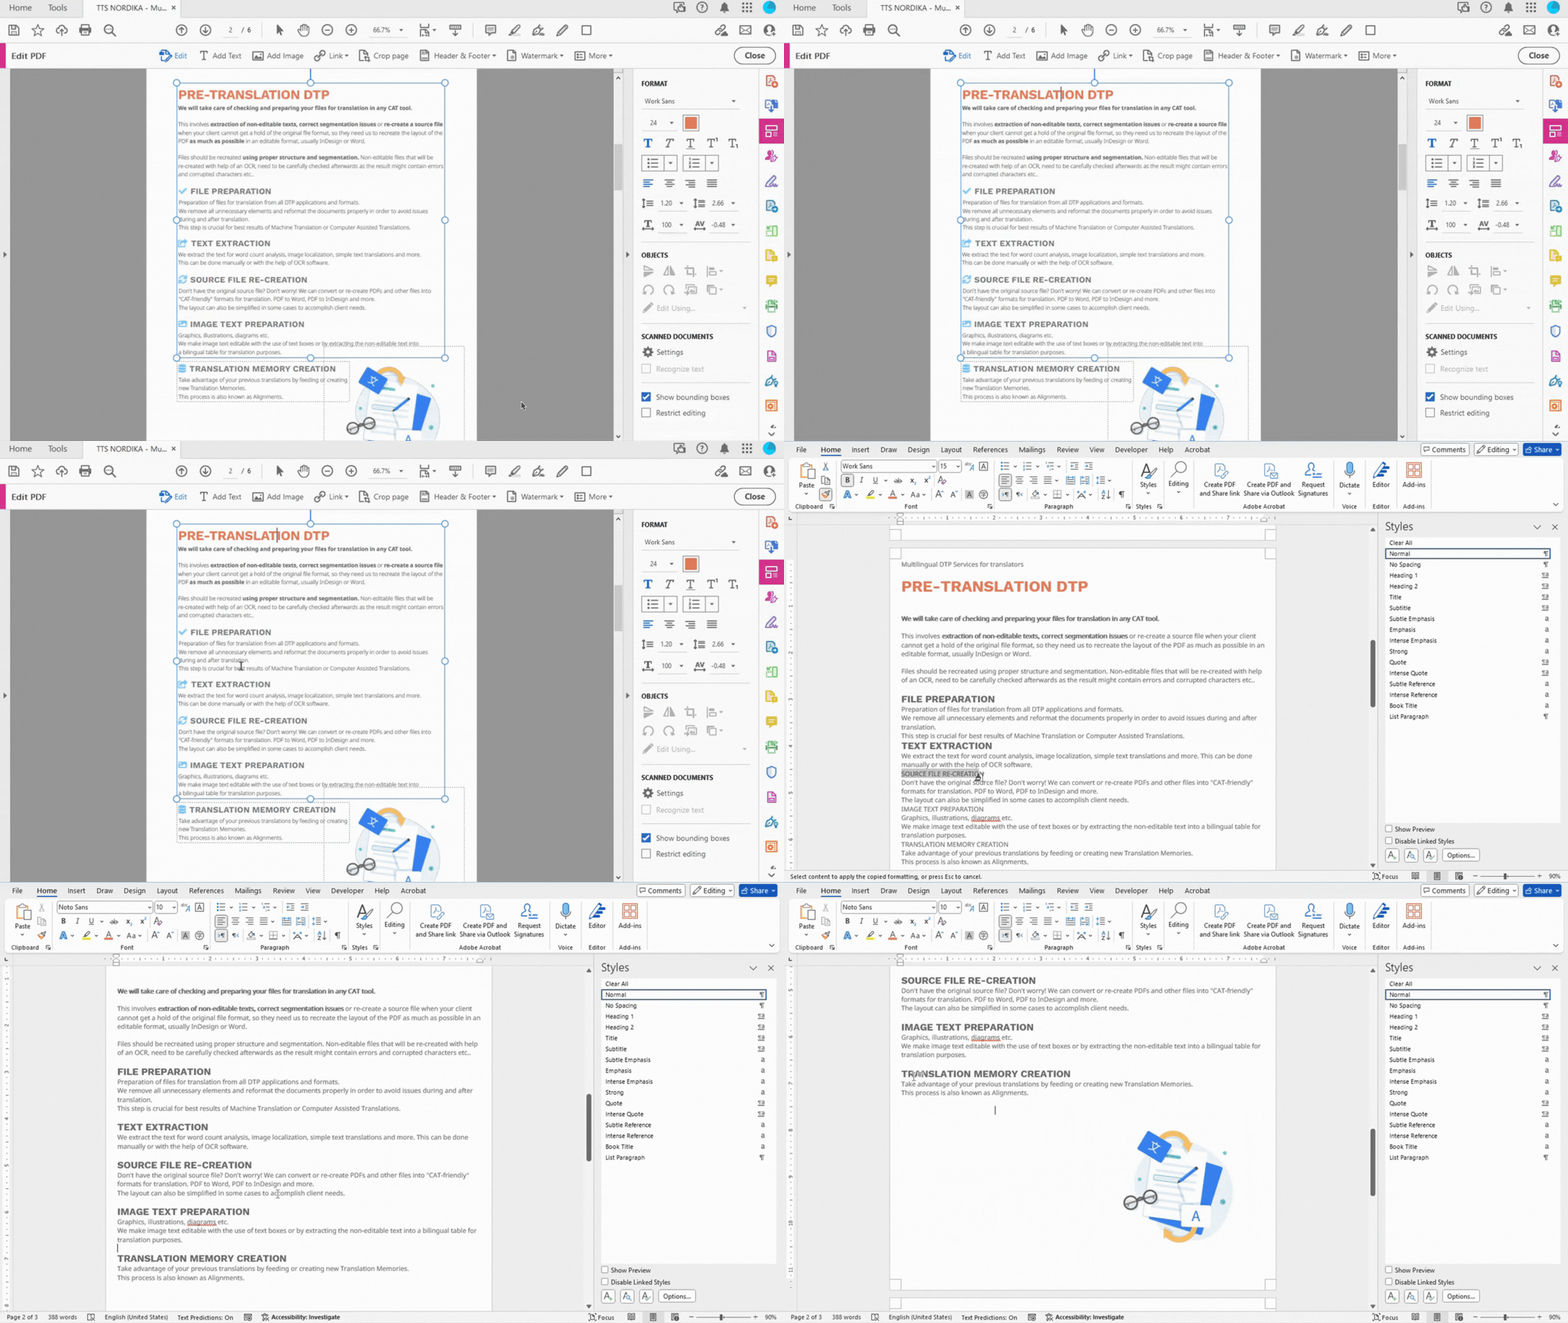
To know what font, size and color to apply to the text, you can find that directly in Adobe Acrobat Pro. By clicking "Edit PDF" and selecting the text you will get all the information you need.
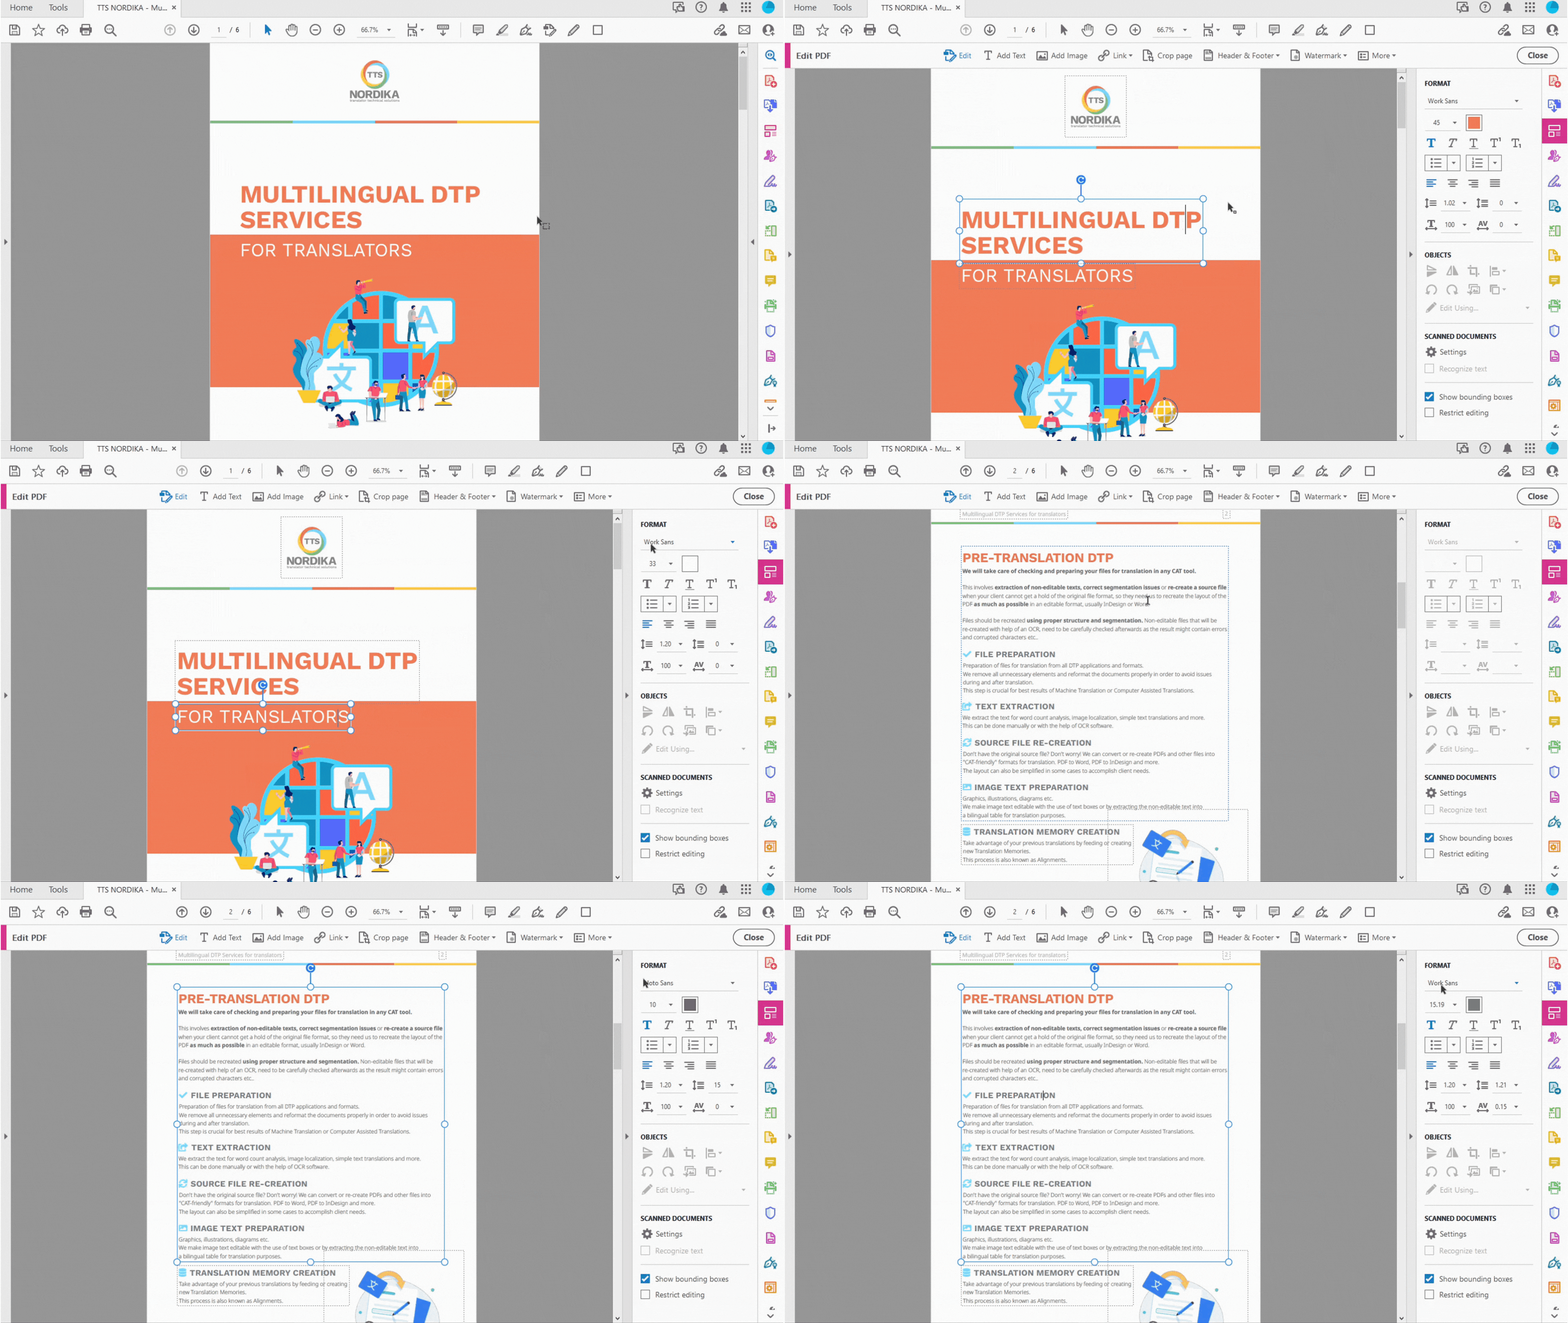
Now that we know the font, size and color of the title, we can apply it to our document and make it look as similar as possible as the source file.
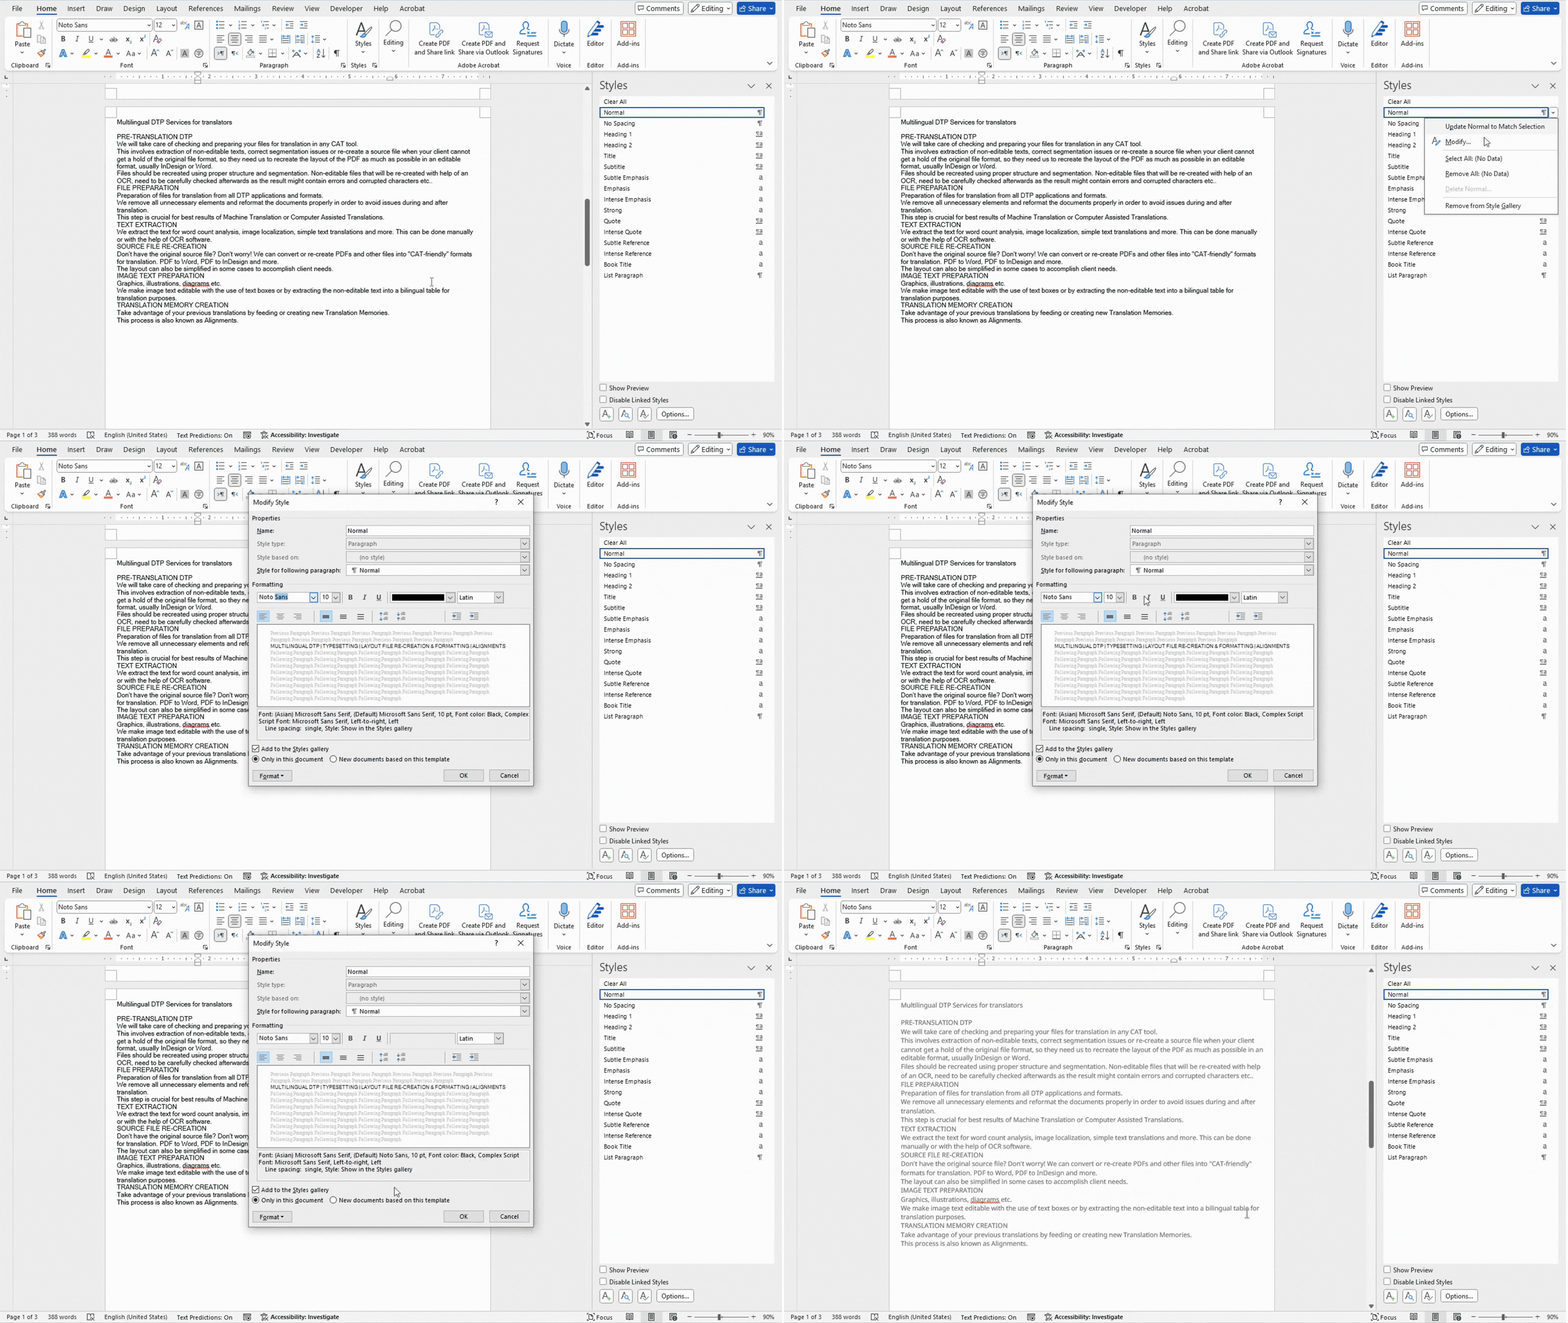
The body text is "Noto Sans", and we can set it as default font by changing the "Normal" in the styles panel.
And then we continue adding styles and images to the rest of the page.
Adjust margins
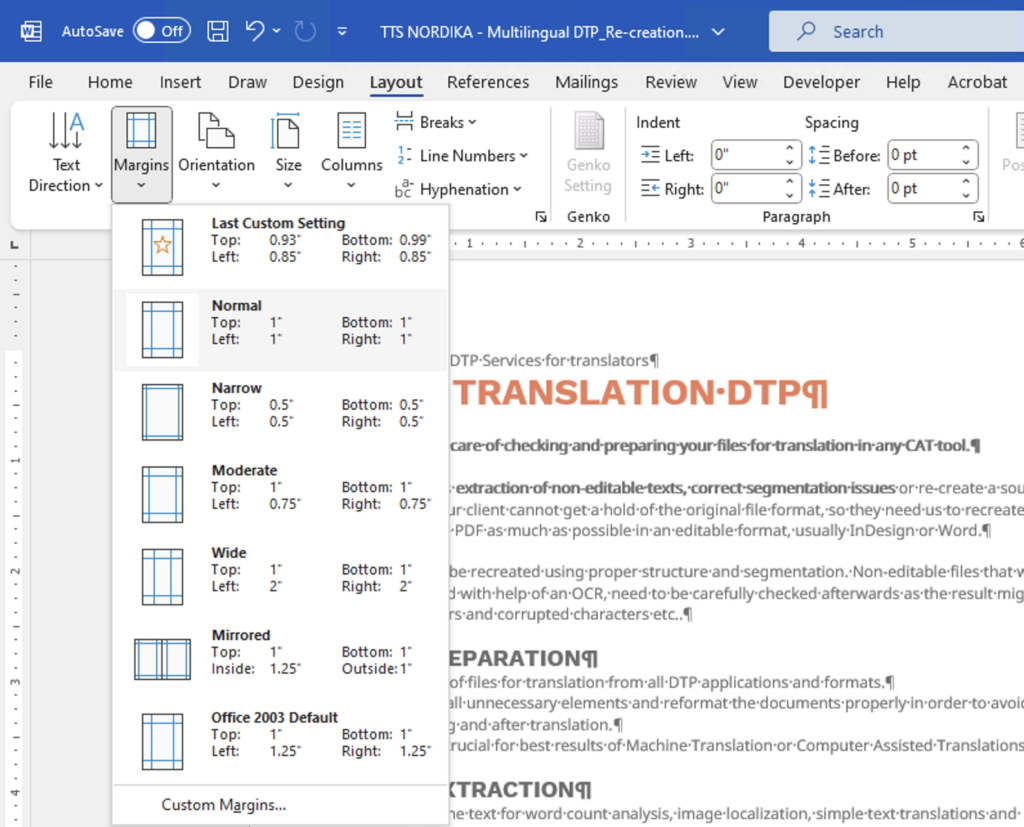
The margins might need to be adjusted to match those in the source file. In this instance, we can set the margins to "Normal," but you may need to experiment with custom margins to achieve the desired result.
Create header and footer
In the following step we will be inserting header and footer to the document. To insert a header, double click at the very top of the document and to insert a footer, double click at the very bottom.
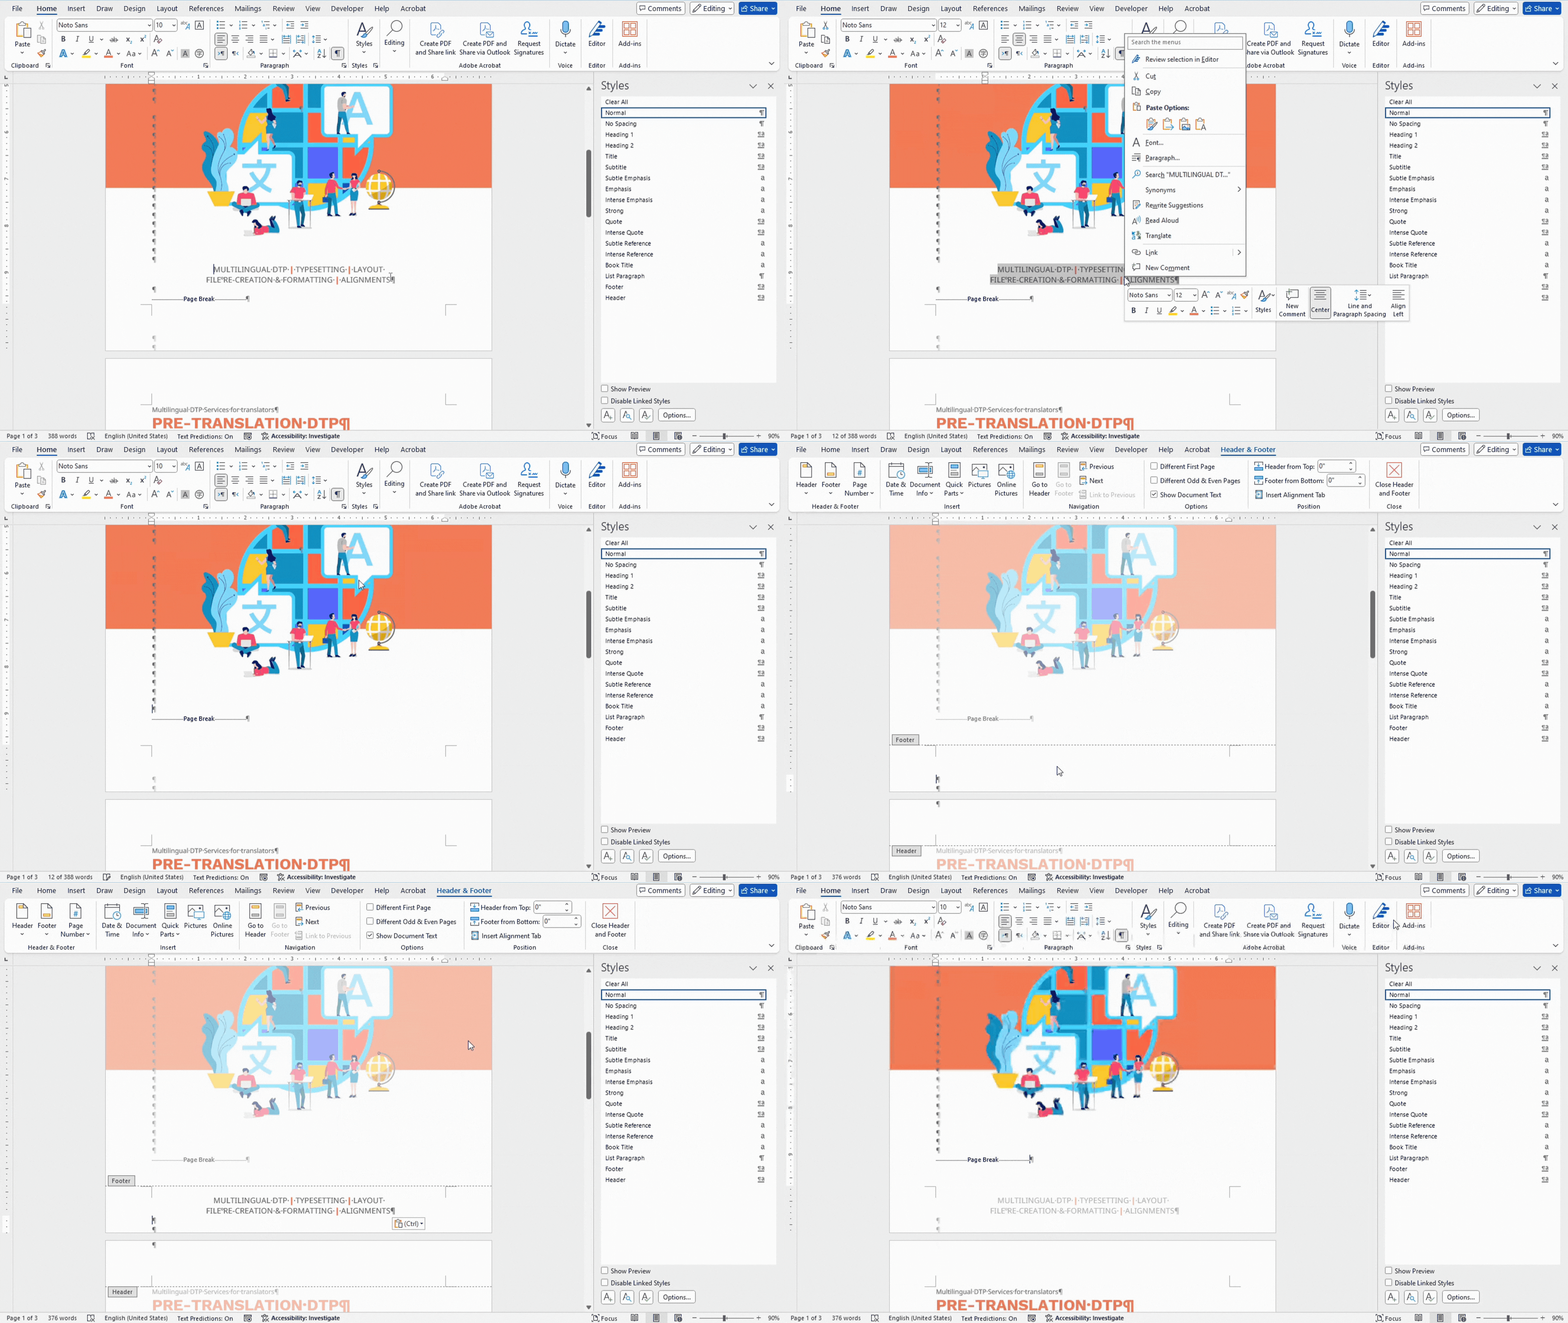
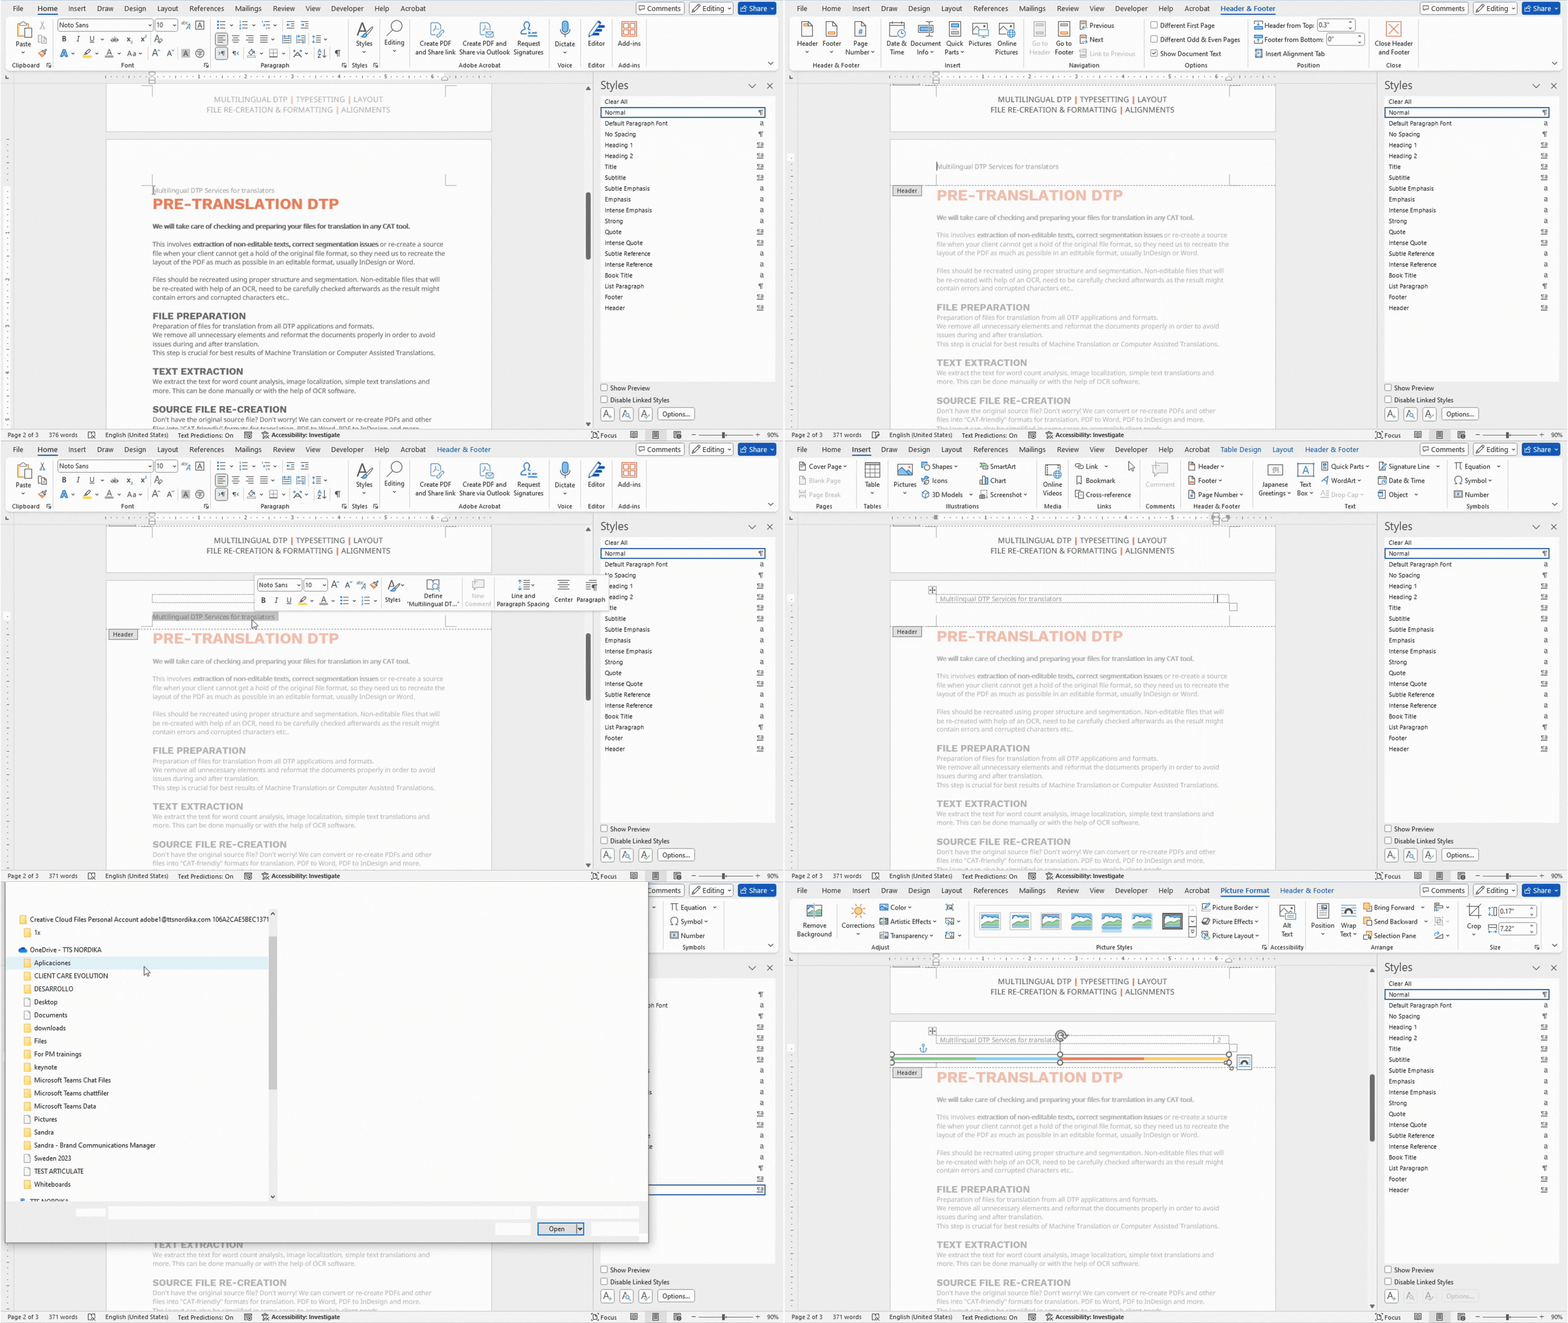
(We insert the header text and page number in a transparent table, so that we don't need to separate them with tabs.)
Page breaks vs Section breaks
Important: The cover page does not have the same header or footer as the rest of the document, but when adding the header to the second page, it automatically adds the same header to all pages (including the cover page). Hence, we need to add a Section break at the end of the first page that will allow us to unlink it from the rest of the document.
In the cover page, remove the Page break at the bottom and go to the "Layout" tab, "Breaks" and select "Next Page" to insert a Section break. Then, double click on the header of the second page and as you can see the option "Link to previous" is active. Click on it to "unlink" it. This will separate the first page from the rest of the document. Now we can delete the header items in the cover page that we don't need there, without them being removed from the rest of the document.
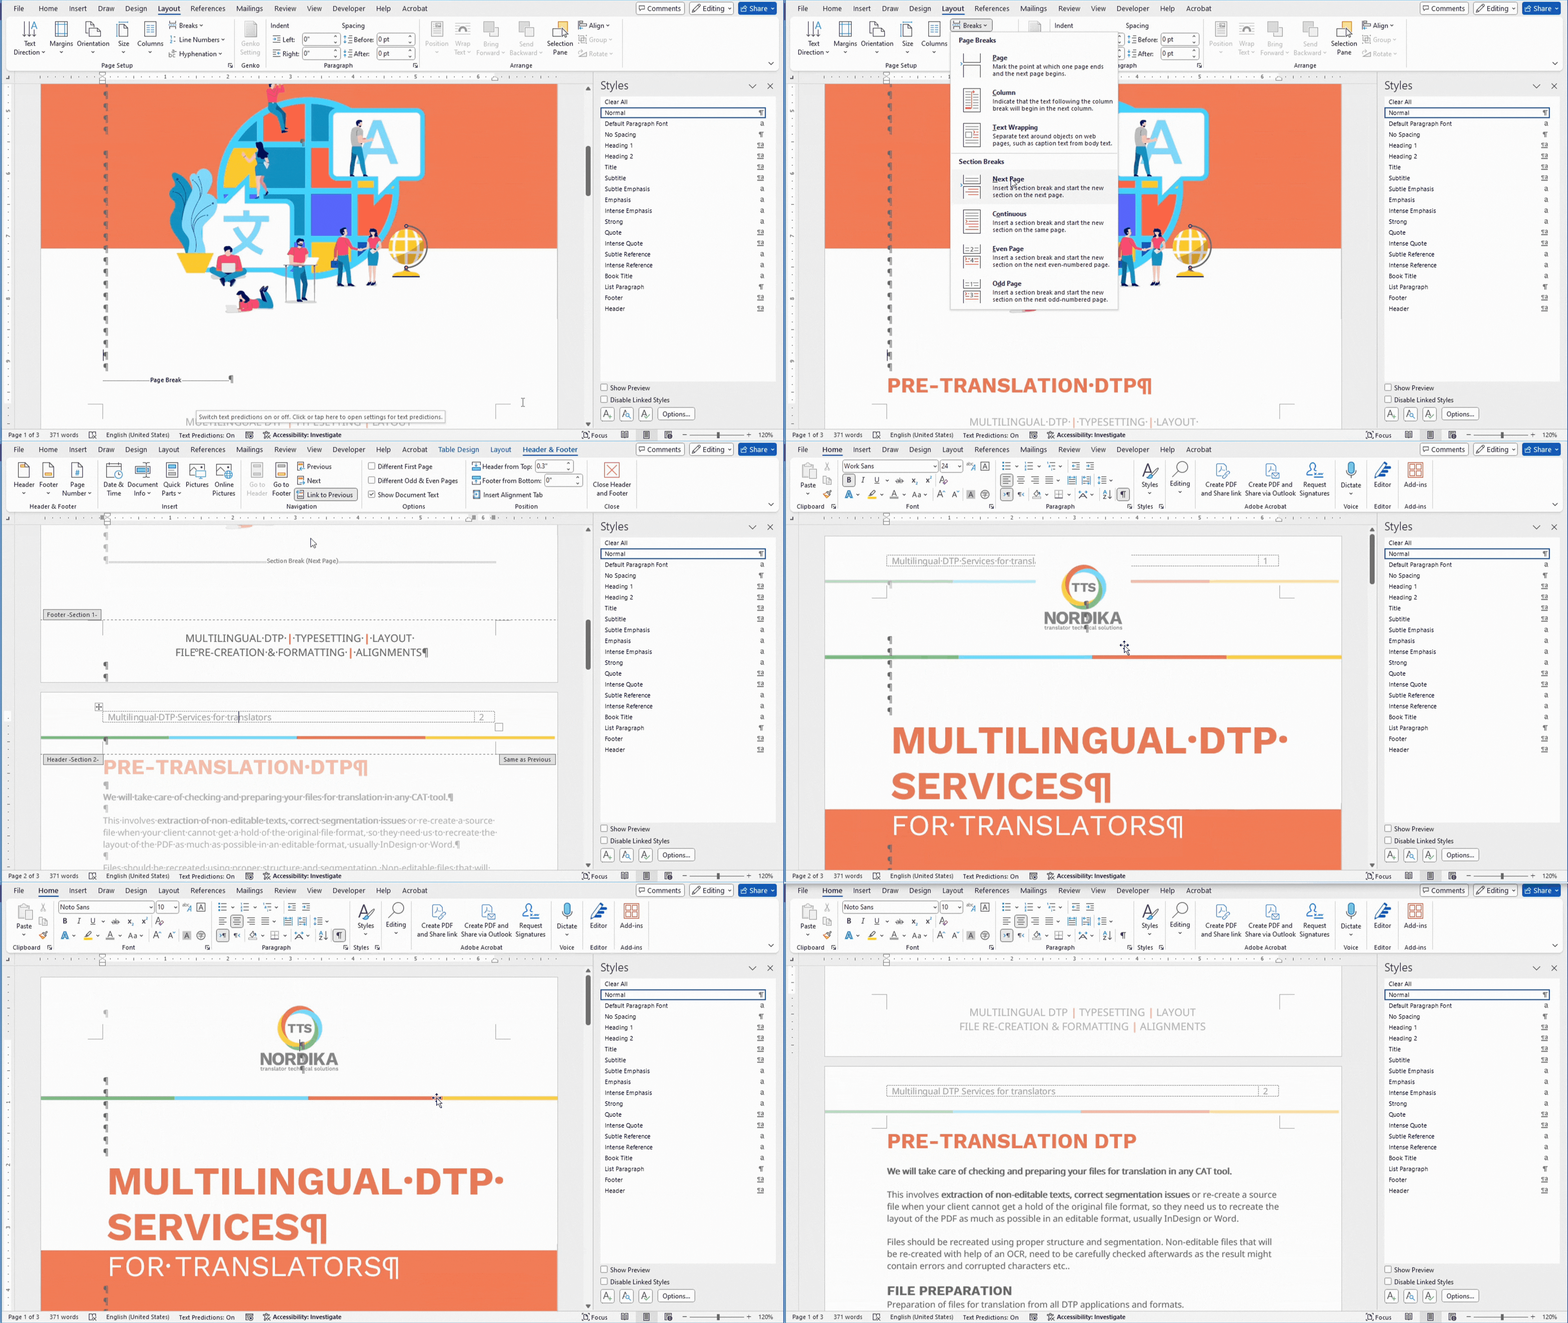
Section breaks should be avoided whenever possible. However, there are instances where they are necessary, such as in this example. Aside from that, we should ensure that all pages have Page breaks.

Re-creating and formatting tables
Microsoft Word is not a robust design software, and achieving an exact match with the source file layout can be challenging. However, there are a few techniques you can use to replicate it as closely as possible. Let's use the table in this document as an example. As you can see, the source table has rounded corners, and you can't add rounded corners to a table in Word.
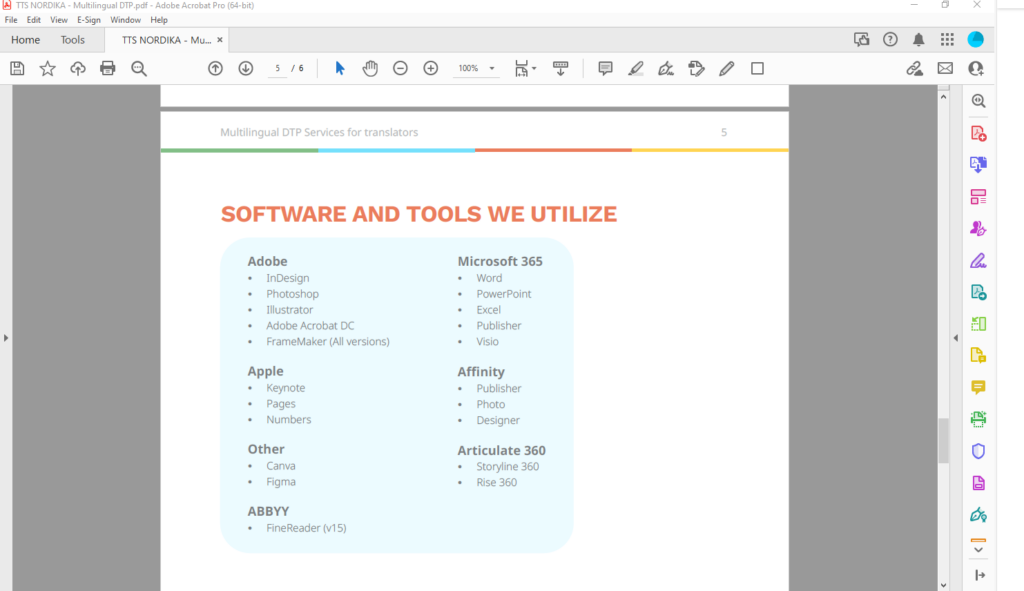
By inserting a square shape with rounded borders behind the table, we can create something similar to the source table.

Conclusions
In conclusion, converting a PDF with a complex layout into a Microsoft Word document often requires significant manual adjustments to achieve a satisfactory result. While Microsoft Word is not primarily a design software, it offers various tools and techniques to help re-create layout as closely as possible to the original. By carefully removing unwanted styles, inserting images, applying text styles, adjusting margins, and handling headers, footers, and page breaks, you can produce a very descent well-formatted and polished document.
For more extensive design tasks, specialized design software such as Adobe InDesign remains the superior choice. These programs provide advanced features and greater control over layout elements, which is more suitable for professional-quality design work. While Word can handle basic layout tasks, knowing when to switch to dedicated design software can save time and ensure better outcomes for your projects.
If you want to learn about the File Preparation for translation process in Microsoft Word, you can read this article.

